How to Install Manufactured Stone Veneer: A Complete Guide for Professional Results
Share
Manufactured stone veneer offers the elegance of natural stone with lower weight and cost. Professionals ensure long-lasting results through proper substrate preparation, metal lath, scratch coats, mortar application, and sealing. It’s ideal for residential fireplaces, exterior facades, commercial walls, and outdoor installations.
Manufactured stone veneer has become a staple in modern architecture, offering the visual richness of natural stone while minimizing the cost, structural complexity, and labor demands associated with traditional stone. For residential and commercial projects alike, stone veneer provides designers, architects, and contractors with a versatile solution that elevates both interiors and exteriors. It can transform a living room with a sophisticated fireplace, enhance the facade of a commercial building, or provide durable, visually striking surfaces for outdoor kitchens, patios, and landscape features.
The adoption of manufactured stone veneer in the construction industry has grown rapidly due to its combination of aesthetic appeal and practical performance. Professionals value it for its light weight, structural flexibility, and broad array of profiles, colors, and textures. Unlike natural stone, veneer allows for faster installation, fewer structural reinforcements, and more predictable results, making it particularly attractive for large-scale or commercial applications. Understanding the material properties, installation methodology, design considerations, and long-term maintenance requirements is essential for achieving high-quality, lasting results. This guide provides an in-depth exploration of manufactured stone veneer, focusing on professional strategies, advanced techniques, and project planning for superior outcomes.
What is manufactured stone veneer?
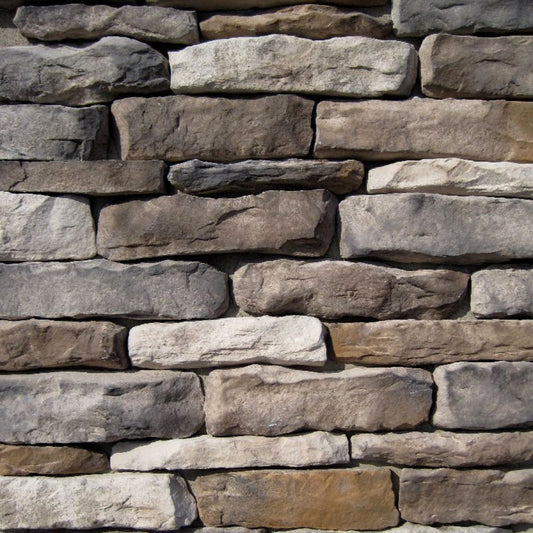
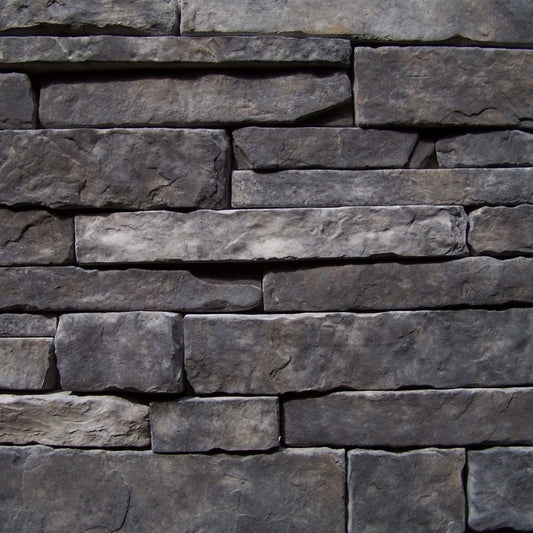
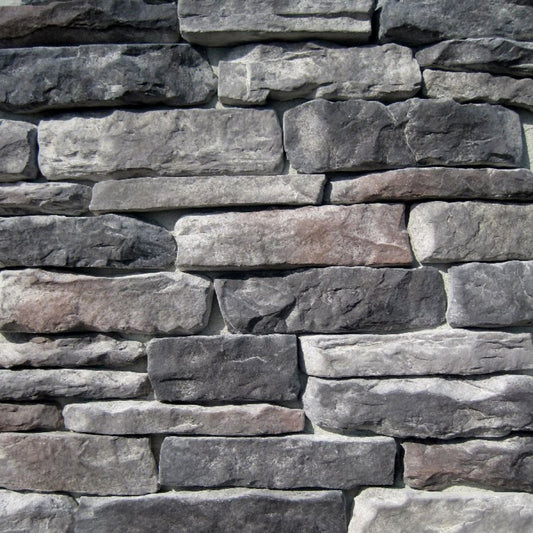
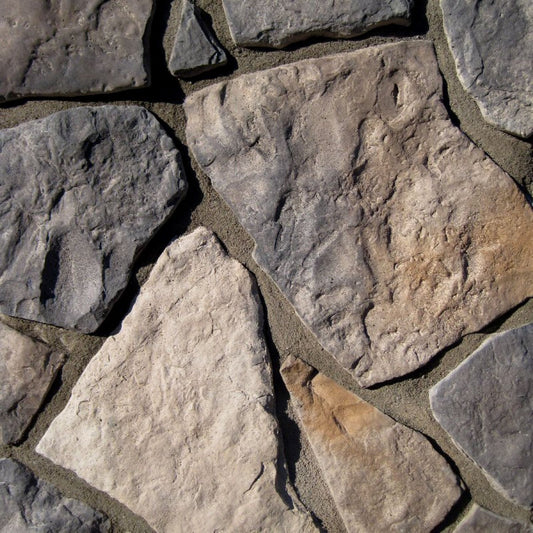
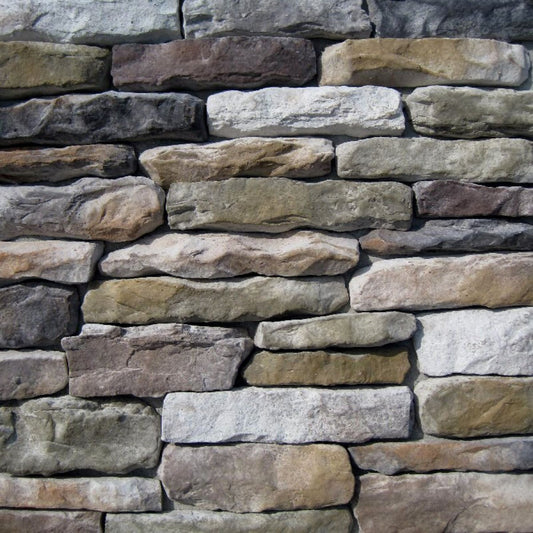
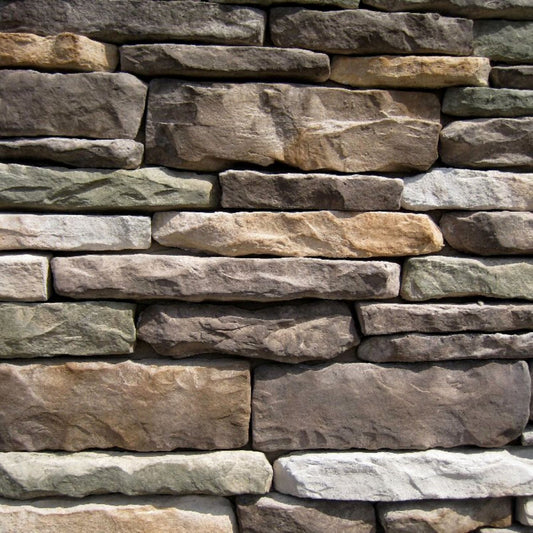
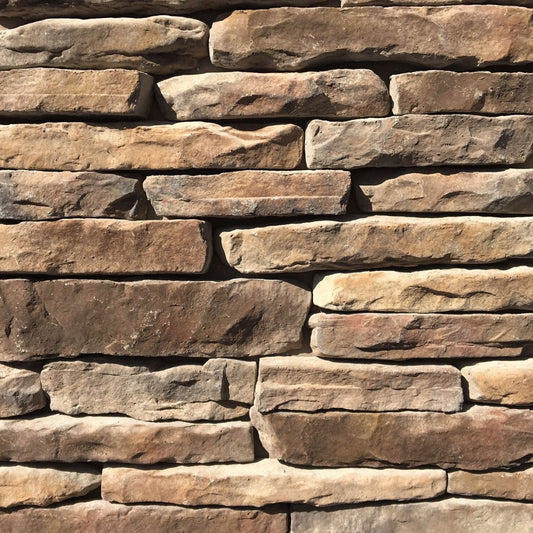
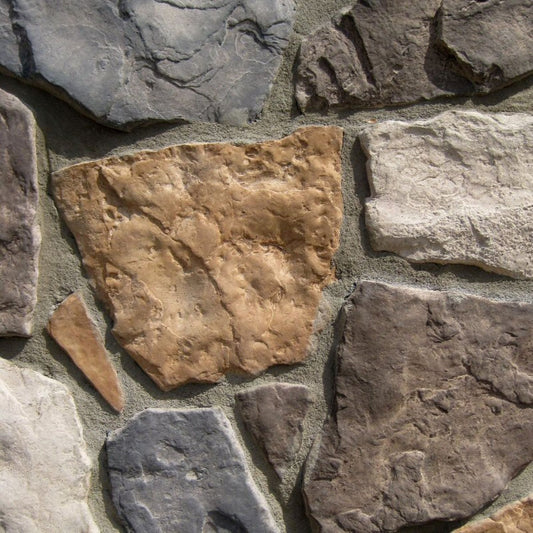
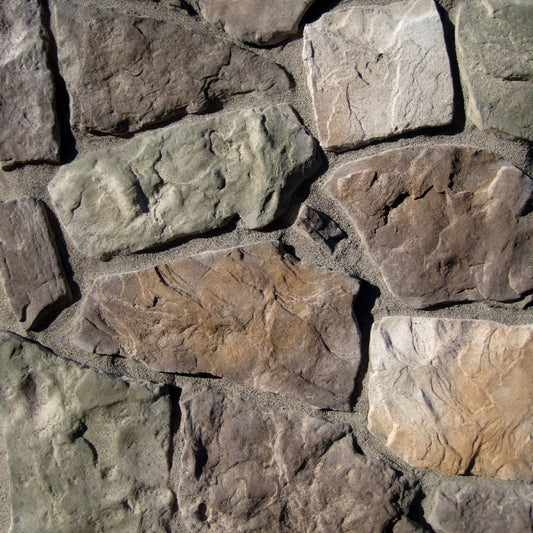
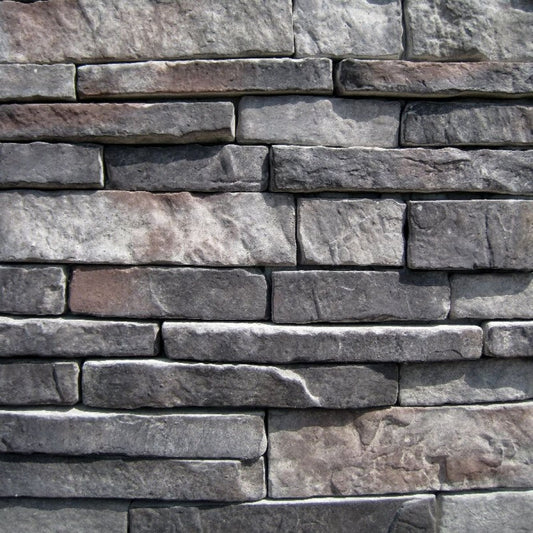
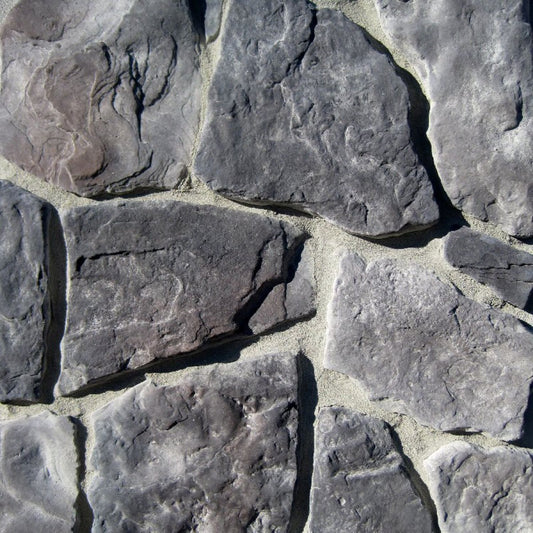
Manufactured stone veneer is a concrete-based material designed to replicate the natural texture, color, and irregularities of real stone. Through sophisticated molding and casting techniques, manufacturers create pieces that capture the aesthetic subtleties of authentic stone while remaining lightweight and easy to handle. Pigments, aggregates, and surface treatments are added during the production process to enhance realism, weather resistance, and long-term durability.
Professionals appreciate manufactured stone veneer for its performance characteristics. Its reduced weight compared to natural stone allows for installation over a variety of substrates without significant structural modification. The material exhibits resistance to cracking and spalling when properly installed and offers better consistency in size and shape than quarried stone, reducing waste and labor costs. Additionally, most manufactured stone veneers meet fire ratings suitable for both interior and exterior applications and withstand freeze-thaw cycles, making them ideal for a range of climates.
Unlike brick, stucco, or natural stone, manufactured stone veneer combines the aesthetic versatility of stone with the efficiency and predictability desired by professional installers. It allows architects and designers to achieve high-end finishes across complex surfaces without compromising structural integrity or design intent.
Residential applications of stone veneer
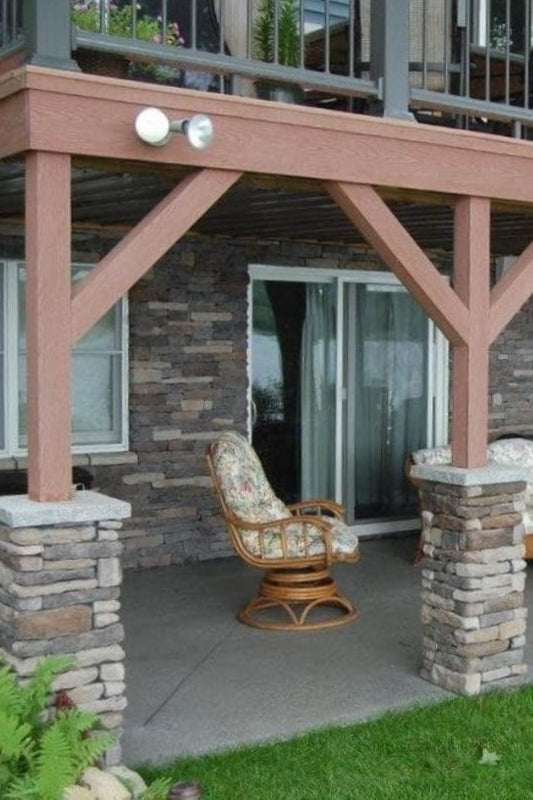
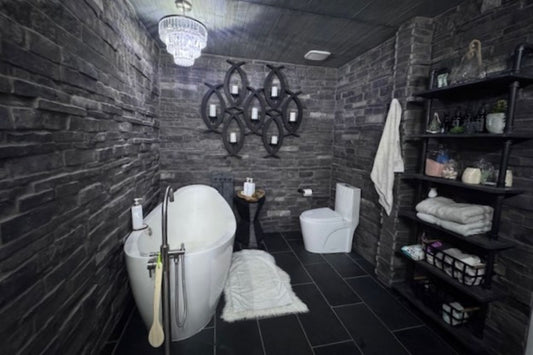
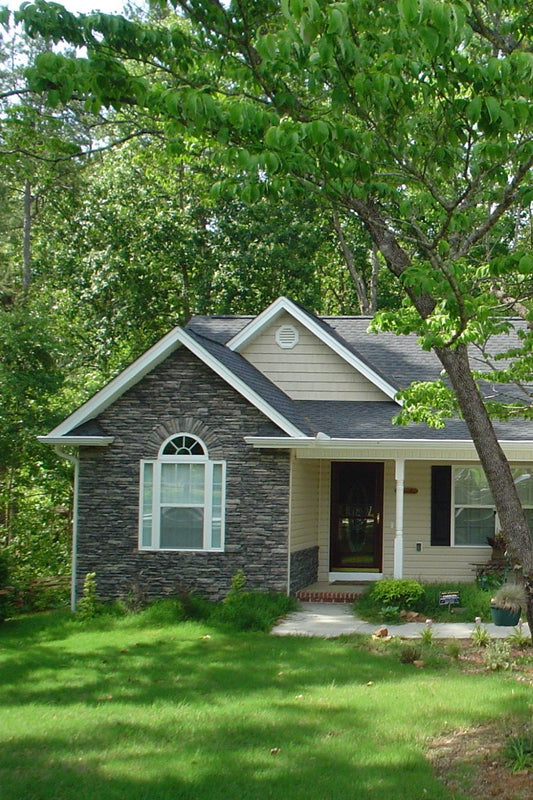
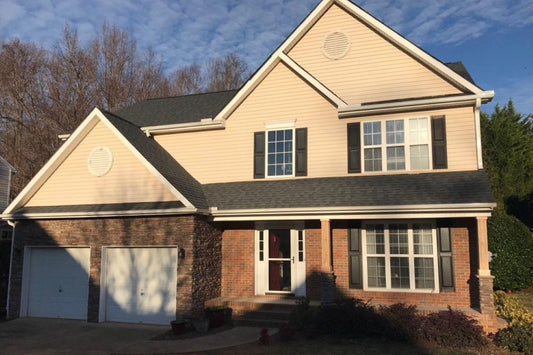
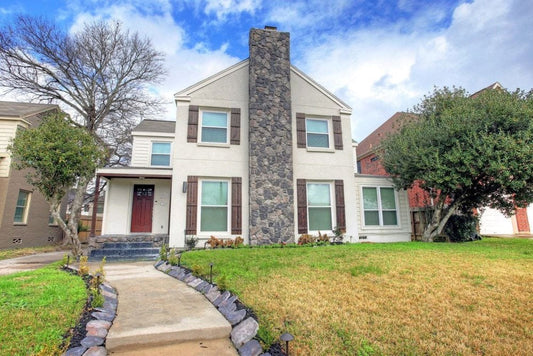
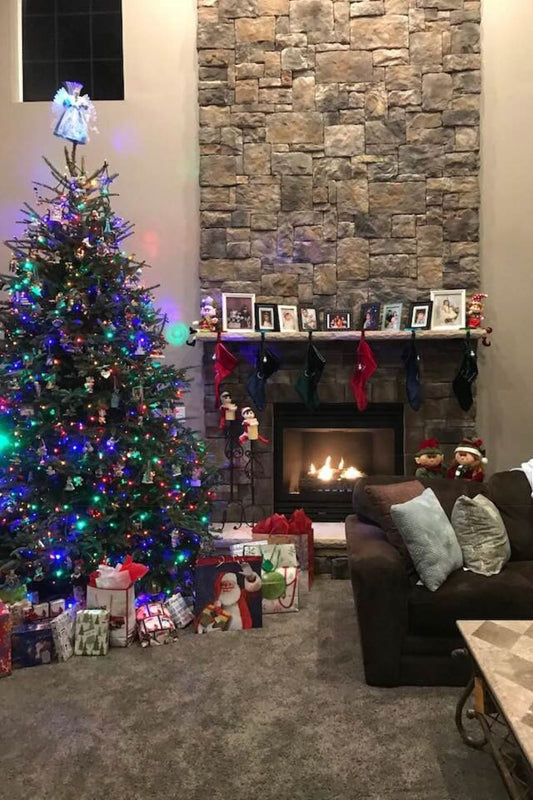
In residential projects, manufactured stone veneer is used to create impactful features that enhance both aesthetics and property value. Fireplaces are among the most common applications, transforming a standard hearth into a focal point that conveys sophistication and warmth. If you’re planning this type of upgrade, our how to install a stone veneer fireplace post walks you through the process step by step, helping you understand how to achieve a professional-looking finish. Accent walls in living rooms, dining rooms, or home offices offer depth and texture, creating visual contrast against flat surfaces while complementing interior finishes such as wood, metal, or glass.
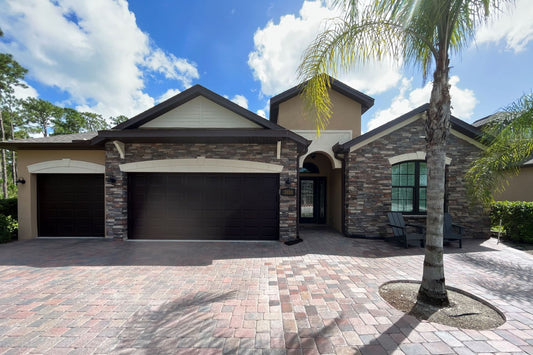
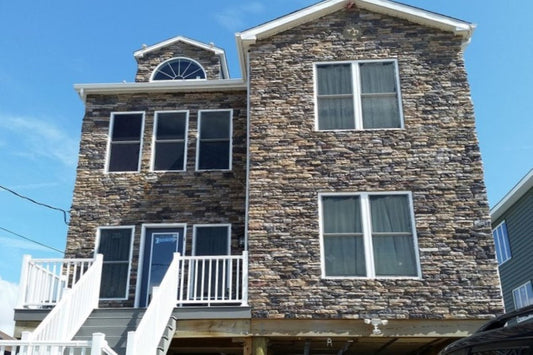
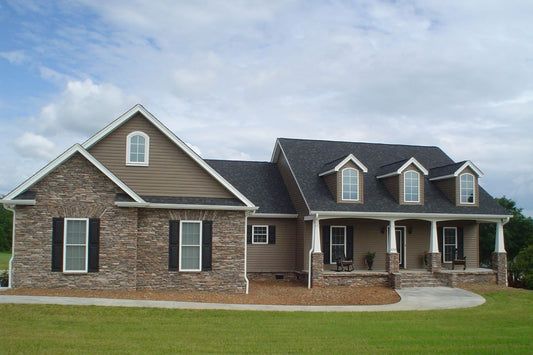
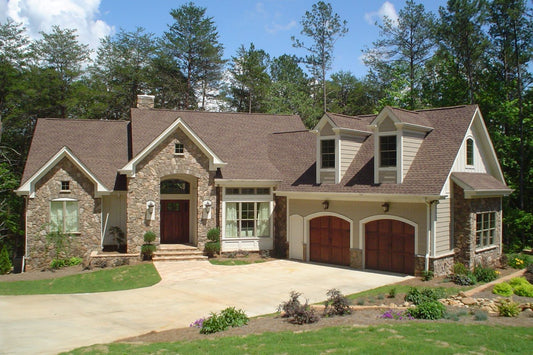
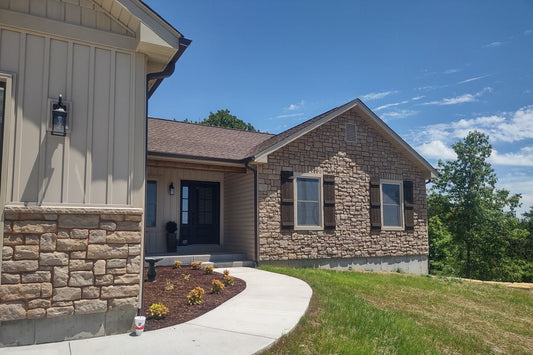
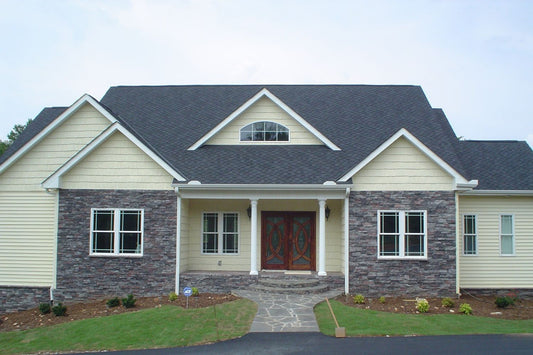
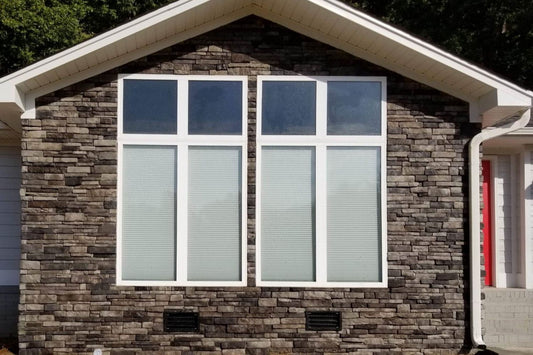
Exterior applications, including full facade renovations and foundation wall cladding, improve curb appeal and architectural cohesion without the structural challenges of full-thickness stone. Outdoor living areas, including kitchens, barbecue surrounds, pergolas, and patio walls, benefit from the material’s heat resistance, durability, and low maintenance requirements. Properly installed stone veneer integrates seamlessly with other architectural elements, enhancing the perception of luxury while providing functional benefits such as protection against weathering and physical wear.
Professionals also leverage manufactured stone veneer to unify disparate spaces. Matching interior and exterior applications, such as aligning an indoor fireplace with an outdoor seating wall, creates a cohesive design narrative. This approach enhances the overall visual impact of a property and elevates its market value, a consideration particularly important in high-end residential developments.
Commercial applications of stone veneer
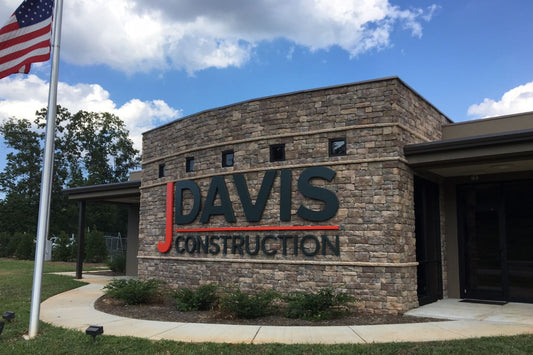
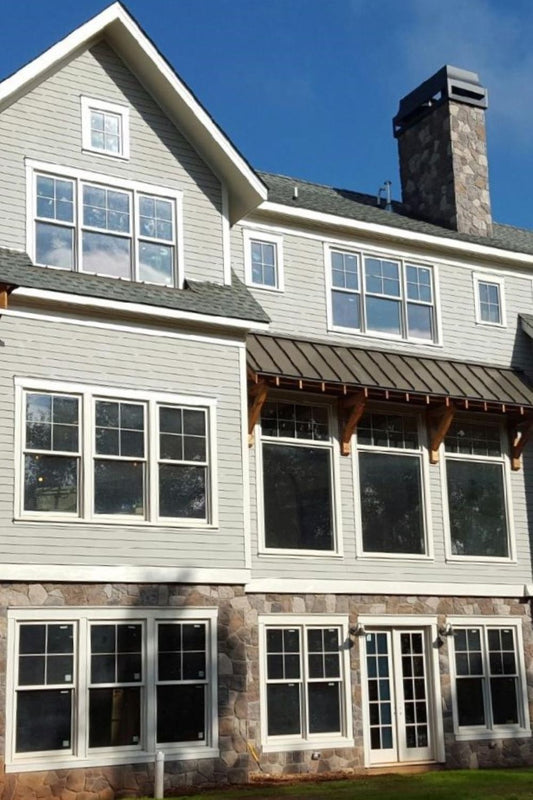
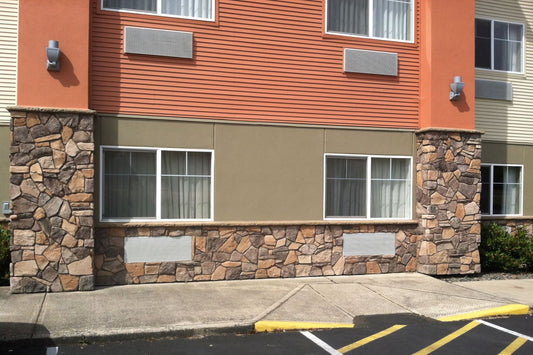
Commercial projects require materials that balance aesthetic impact, durability, and maintenance efficiency, making manufactured stone veneer an ideal choice. Retail storefronts, restaurant facades, office lobbies, and hospitality venues use stone veneer to convey quality, permanence, and brand identity. Unlike natural stone, veneer allows designers to achieve upscale finishes efficiently, without significant structural reinforcement or extended project timelines.
Commercial outdoor applications, including terraces, courtyards, outdoor dining areas, and landscape walls, benefit from the veneer’s resilience under heavy foot traffic and exposure to environmental elements. The material’s versatility allows architects to customize color, profile, and texture to align with corporate branding or architectural language, ensuring a unified and professional appearance across a site. Commercial property managers also favor veneer for its low long-term maintenance requirements and durability, which reduces operational costs and extends the lifespan of facades and exterior features.
Planning and preparing for a stone veneer installation
Successful stone veneer installation begins long before the first piece of stone touches the wall. Proper planning and preparation are essential to ensure that the finished surface is durable, visually cohesive, and aligned with the design intent. Professionals approach each project with careful evaluation of the site, substrates, materials, and environmental conditions, creating a foundation for high-quality results that will last for years.
Understanding the tools required for a successful installation is an important part of the planning stage. Having the correct equipment on hand before work begins helps streamline the process, reduces delays, and ensures each step is completed properly from preparation through to finishing. For a complete breakdown of the equipment used at every stage, see our post on tools needed to install manufactured stone veneer.
The first step in planning involves a thorough assessment of the substrate. Manufactured stone veneer requires a solid, stable base for adhesion, which may include concrete, masonry walls, or wood framing prepared with galvanized metal lath and a scratch coat. Evaluating the substrate ensures that it can support the veneer’s weight and provides an opportunity to address any surface irregularities, moisture issues, or structural concerns prior to installation. For exterior applications, professionals always incorporate a weather-resistant barrier to prevent water intrusion and reduce the risk of long-term damage. Proper installation also requires maintaining clearance between the stone veneer and the ground. Manufactured stone veneer should not be installed directly against soil, mulch, or landscaping because constant moisture exposure can contribute to staining, deterioration, and potential freeze-thaw damage. Keeping the veneer above grade helps protect the installation and supports long-term durability. For a deeper understanding of how moisture and improper installation at the base of a wall can affect performance, see our post on can stone veneer touch the ground?
Accurate measurement and layout planning are also critical. Calculating the total square footage of walls, corners, accent features, and any architectural details allows for precise material ordering and minimizes waste.
Planning the arrangement of stone profiles and colors before installation ensures natural variation and avoids repetitive patterns that can detract from the overall appearance. Professionals often perform a dry lay the stones on the ground to preview color distribution, blending, and profile alignment. This step is particularly important for large walls, commercial facades, or projects with complex corners and curves.
Environmental conditions must be assessed as part of the preparation process. Temperature, humidity, and precipitation can all affect mortar curing and stone adhesion. Professional installers schedule work within recommended temperature ranges and, when necessary, plan for cold-or-hot-weather adjustments such as additives, temporary coverings, or staged curing techniques. Adequate lighting, scaffolding, and access equipment are also considered to facilitate precise stone placement and consistent quality throughout the installation.
Material selection is another key component of planning. Professionals carefully choose stone profiles, colors, and sizes that align with the architectural style and intended design, ensuring both aesthetic appeal and functional performance. Mortar type and consistency, along with metal lath and substrate preparation methods, are determined based on the specific requirements of the project. By integrating material selection into the planning phase, installers can prevent issues such as adhesion failure, color mismatch, or structural inconsistencies.
In professional stone veneer projects, proper planning and preparation ultimately save time, reduce errors, and elevate the finished result. Attention to substrate evaluation, layout strategy, environmental conditions, and material selection establishes a strong foundation for installation, ensuring that the stone veneer not only looks visually authentic but also maintains its integrity for years to come. By approaching planning as a critical phase rather than a preliminary step, professionals deliver installations that are structurally sound, visually appealing, and capable of withstanding both residential and commercial demands.
For a detailed look at the installation challenges and tips, see our post is stone veneer hard to install?
Estimating material quantities for stone veneer
Accurate estimation of material quantities is a critical step in professional stone veneer projects. Whether for residential or commercial installations, proper planning of stone, mortar, metal lath, and other materials ensures cost efficiency, reduces waste, and supports a smooth workflow throughout the project. Professionals approach material estimation systematically, combining surface measurements, stone profile analysis, and installation techniques to achieve precise results.
The process begins with detailed measurement of the project area. This includes calculating the total square footage of walls, accent areas, and architectural features such as corners, columns, or fireplaces. Outside and inside corners require linear measurement in addition to surface area, as corner pieces are often cut or specially shaped to maintain continuity. Accurate measurements allow for precise ordering of stone veneer and provide insight into the quantity of mortar and metal lath required.
Stone veneer pieces vary in size, thickness, and profile, which affects coverage rates. Manufacturers typically provide coverage information in square feet per box, but professionals account for additional factors such as cuts, waste, and color blending. Industry-standard practice is to order 10-15% extra stone to accommodate irregular cuts, future repairs, and natural variation in the stone’s appearance. This buffer ensures that the project maintains a consistent look without running short during critical stages of installation.
Mortar estimation is closely tied to the stone quantity and installation method. Factors such as back-buttering, joint width, and scratch coat thickness influence the total mortar volume required. Professionals often calculate mortar based on surface area while factoring in application thickness, ensuring enough material for both substrate preparation and stone adhesion. When working with large walls or commercial facades, ordering mortar in bulk batches can maintain consistency in color and performance across the project.
Metal lath and fasteners are also quantified based on wall dimensions and attachment points. Lath must extend across the entire substrate and be securely fastened to meet structural and code requirements. Additional allowances are included for overlapping at seams, corners, and edges. Proper planning of these materials reduces the likelihood of shortages that could delay installation or compromise the veneer’s structural integrity.
By integrating stone coverage, mortar volume, and metal lath requirements into a comprehensive material plan, professionals ensure that the installation proceeds efficiently and consistently. Precise estimation minimizes waste, controls costs, and contributes to a high-quality finished surface. Careful attention to these details distinguishes professional stone veneer installations from ad-hoc projects, ensuring that both aesthetics and performance meet the highest standards.
Surface preparation for stone veneer
Surface preparation is one of the most critical steps in a professional stone veneer installation. A properly prepared substrate ensures structural stability, long-term adhesion, and a flawless appearance. Neglecting this step can lead to cracking, detachment, or uneven finishes, compromising both durability and aesthetics. Professional installers prioritize surface preparation to create a solid foundation for every stone veneer project, whether interior or exterior.
Weather-resistant barriers are a key component of surface preparation, especially for exterior applications. These barriers protect the underlying structure from water penetration, reduce the risk of mold or rot, and improve the longevity of the stone veneer system. Over the barrier, galvanized metal lath is installed to provide a mechanical base for the scratch coat and mortar. Understanding when metal lath is required and how it contributes to a successful installation is essential, so see our post on do you need metal lath for stone veneer installation? for a detailed explanation of lath requirements, approved surfaces, and installation considerations. Lath must be securely fastened with corrosion-resistant fasteners at appropriate spacing and anchored into structural supports to ensure stability under the weight of the stone veneer. Overlapping seams and proper corner detailing are essential to maintain structural integrity and prevent water infiltration.
Once the substrate and lath are in place, a scratch coat of mortar is applied. This layer, typically ½ inch thick, is combed with horizontal grooves to create an ideal bonding surface for the stone veneer. The scratch coat must be applied evenly across the entire wall, with special attention to corners, edges, and any irregular surfaces. Professionals allow the scratch coat to cure fully, often 24 to 48 hours, before beginning stone installation. Proper curing ensures strong adhesion and reduces the risk of cracking or detachment over time.
Surface preparation is not merely a procedural step; it is the foundation of a high-quality stone veneer installation. By thoroughly evaluating substrates, installing weather barriers and lath, and applying a properly cured scratch coat, professionals establish the structural and aesthetic conditions necessary for a durable, visually stunning finish. Attention to detail at this stage directly impacts the longevity, performance, and overall success of residential and commercial stone veneer projects.
Mixing and applying mortar for stone veneer installation
Mortar plays a critical role in the durability and long-term performance of stone veneer installation. In professional manufactured stone veneer installations, mortar functions as the bonding agent that secures each stone to the prepared substrate while supporting the structural stability of the veneer system. Proper selection, mixing, and application of mortar for stone veneer ensures that the finished installation can withstand environmental stresses such as temperature fluctuations, moisture exposure, and freeze–thaw cycles. Choosing the correct bonding method is essential for long-term performance, see stone veneer installation: mortar or glue? to understand why mortar is required over adhesives in professional installations.
Professional installers typically use high-strength masonry mortars designed specifically for manufactured stone veneer installation. In many projects, Type S mortar is commonly specified because it provides the compressive strength and bonding characteristics necessary to support stone veneer on vertical surfaces. If you're comparing mortar options, our complete post to Type N vs. Type S mortar for manufactured stone veneer installation explains the differences, recommended applications, and why Type S is generally preferred for manufactured stone veneer. The correct mortar formulation is particularly important for exterior applications where weather exposure can place significant stress on the bonding system. Consistency between mortar batches is also essential, especially for large residential projects or commercial stone veneer facades, since variations in mixing ratios can affect both bonding performance and joint coloration.
The mortar mixing process must produce a consistent, workable material that adheres effectively to both the stone veneer and the prepared wall surface. Properly mixed mortar should have a thick, creamy texture that remains workable while maintaining enough body to hold the weight of the stone. Mechanical mixing equipment is often used on professional installations to ensure uniform blending of cement, sand, and additives. Consistent mixing improves bonding reliability and helps eliminate dry pockets or inconsistencies that could weaken the mortar used for stone veneer mortar application.
During installation, mortar is typically applied using the back-buttering method, which is widely recognized as a best practice for stone veneer mortar application. In this process, mortar is applied directly to the back of each stone before it is placed against the prepared scratch coat. This technique ensures full mortar coverage and helps eliminate air pockets that could reduce adhesion or allow moisture to accumulate behind the veneer. Each stone is pressed firmly into the wall surface and slightly adjusted during placement to create a strong mechanical bond between the mortar layers.
Maintaining consistent mortar thickness is another important aspect of professional stone veneer installation. Adequate mortar coverage allows the installer to compensate for slight variations in stone thickness while ensuring that each piece sits securely within the wall system. Uniform mortar application also helps maintain consistent joint spacing and alignment, which contributes to the natural appearance of the finished veneer surface. When the installation design includes visible mortar joints, additional mortar is applied between stones and later tooled to achieve the desired joint profile.
Environmental conditions must also be considered when mixing and applying mortar for manufactured stone veneer installation. Temperature, humidity, and wind exposure can influence curing time and mortar workability. Professional installers carefully manage these conditions by adjusting mixing schedules, protecting freshly installed stone from extreme weather, and allowing sufficient curing time for the mortar to develop its full strength.
When mortar is mixed and applied correctly, it provides the structural foundation for a successful stone veneer installation. Consistent mixing practices, proper mortar application techniques, and careful attention to curing conditions ensure that manufactured stone veneer remains securely bonded and visually appealing for decades. High-quality mortar work ultimately supports the durability, safety, and architectural impact that make stone veneer a popular choice for both residential and commercial building projects.
Why Type S mortar is recommended for stone veneer installation
Selecting the correct mortar is essential for a durable and reliable stone veneer installation. In most professional applications, Type S mortar is recommended for installing manufactured stone veneer because it provides the strength, bonding capability, and weather resistance required to support stone on vertical surfaces. Using the proper mortar ensures that the veneer remains securely attached to the substrate and performs well in both interior and exterior environments. Using the proper mortar ensures that the veneer remains securely attached to the substrate and performs well in both interior and exterior environments, see our post best adhesive for installing stone veneer for a deeper breakdown of why Type S mortar is the preferred choice.
Type S mortar is specifically formulated to provide high compressive strength and strong adhesion, making it well suited for stone veneer mortar applications. Manufactured stone veneer pieces must remain firmly bonded to the prepared wall surface, and the mortar must be able to support the weight of the stone while maintaining flexibility under environmental stress. The strength of Type S mortar helps prevent issues such as stone movement, cracking, or detachment over time.
Exterior stone veneer installations are exposed to a range of environmental conditions, including moisture, temperature fluctuations, and freeze–thaw cycles. Type S mortar offers improved resistance to these stresses compared to weaker mortar mixes, allowing the veneer system to maintain its structural integrity even in demanding climates. Its durability makes it the preferred choice for residential facades, commercial walls, fireplaces, and other architectural stone veneer applications.
Using the correct mortar is an important part of ensuring long-term performance. By specifying Type S mortar for manufactured stone veneer installation, professionals can achieve strong adhesion, reliable structural support, and a finished surface that maintains both its appearance and durability for many years.
Setting stones in manufactured stone veneer installation
Setting stones is the stage where a stone veneer installation begins to take its final shape. Proper placement of each piece is essential for achieving both the structural integrity and natural appearance that manufactured stone veneer is known for. In professional installations, careful attention to stone placement, alignment, and bonding ensures that the finished wall performs well over time while maintaining the visual depth and variation associated with natural stone masonry.
The process typically begins with the installation of corner pieces, which establish the structural lines and visual framework of the wall. Corners create the illusion of full-thickness stone and help guide the alignment of the remaining stones across the surface. Once the corners are set, installers work outward and upward, carefully placing each stone to maintain consistent spacing and natural variation. This method supports the weight of the veneer as the wall progresses and helps prevent shifting or misalignment during installation.
Each stone must be firmly bonded to the prepared substrate to ensure long-term durability. After mortar has been applied using the back-buttering method, the stone is pressed securely into the scratch coat and slightly adjusted to achieve full mortar contact. This movement helps eliminate air pockets and strengthens the mechanical bond between the mortar and the wall surface. Proper adhesion is critical for maintaining stability, particularly in exterior manufactured stone veneer installations exposed to weather and temperature fluctuations.
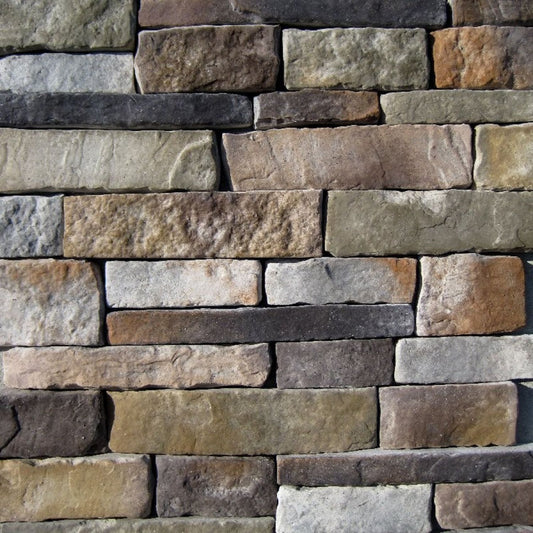
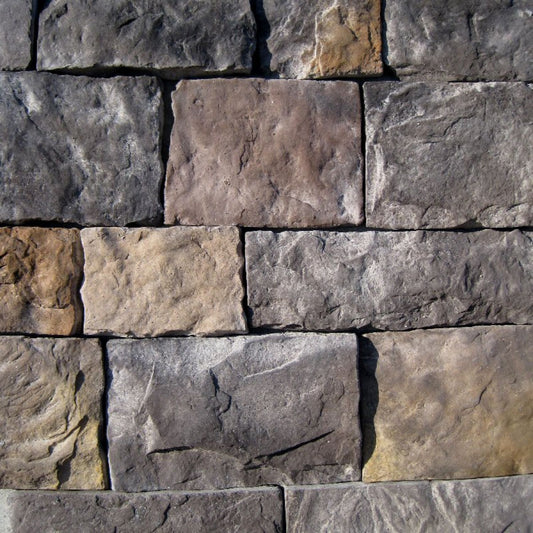
Visual balance is another important consideration when setting stones. Professional installers typically blend stones from multiple boxes to distribute color tones, shapes, and textures evenly across the wall. This blending process prevents noticeable color clusters and helps recreate the random, organic appearance of natural stone. Careful stone placement also ensures that vertical seams are staggered and that joints remain consistent throughout the installation, contributing to a cohesive finished look.
Attention to detail during stone placement ultimately determines the success of a stone veneer installation. Proper bonding, consistent alignment, and thoughtful blending of stone pieces create a surface that appears natural and refined while delivering the durability expected from professionally installed manufactured stone veneer. When stones are set correctly, the finished installation provides both architectural character and long-term performance in residential and commercial applications.
Cutting stones for manufactured stone veneer installation
Cutting stones is a common part of a professional stone veneer installation, particularly when working around corners, architectural features, and transitions between materials. This becomes especially important when working with angled surfaces such as sloped walls, returns, or non-90-degree corners, where precise miter cuts are required. For step-by-step guidance, see how to install manufactured stone veneer on angled surfaces. Manufactured stone veneer pieces are designed with natural variation in shape and size, but adjustments are often required to achieve precise fits and maintain the natural flow of the installation. Proper cutting techniques allow installers to maintain consistent joint spacing, clean edges, and a balanced appearance across the finished surface.
In most installations, stones must be trimmed to fit around outlets, windows, fireplaces, columns, or other architectural details. Cutting also helps maintain proper alignment along edges and transitions, ensuring that the veneer integrates smoothly with surrounding building materials. Professionals plan cuts carefully so that trimmed edges are positioned where they will be least visible, preserving the natural appearance of the stone veneer wall. For a deeper look at when, why, and how stones should be modified on-site, see our post can you cut stone veneer?
Specialized masonry tools are typically used to cut manufactured stone veneer. Wet saws with diamond blades are commonly preferred because they produce clean, precise cuts while minimizing dust and chipping. Angle grinders with masonry blades may also be used for detailed trimming or shaping stones to fit irregular areas. These tools allow installers to shape individual pieces while maintaining the texture and dimensional quality that give stone veneer its authentic appearance.
Cut placement is an important consideration in maintaining a natural layout. Installers often position cut stones near the ends of courses, around corners, or within tight spaces where full pieces would not fit properly. This approach prevents repetitive patterns and helps the finished wall retain the random, organic look associated with natural stone construction. When stones are cut carefully and integrated thoughtfully, the transitions appear seamless and visually consistent.
Precision during the cutting process also contributes to the structural integrity of the installation. Clean edges allow stones to sit properly within the mortar bed, ensuring consistent bonding and stable placement across the wall surface. Poorly cut stones can create uneven joints or weak contact points, which may compromise both the appearance and durability of the veneer system.
By combining accurate measurement, proper tools, and thoughtful placement of trimmed pieces, professionals ensure that stone veneer installations maintain both visual authenticity and long-term performance. Careful stone cutting allows the veneer to adapt to complex architectural layouts while preserving the natural beauty that makes manufactured stone veneer a popular choice for residential and commercial projects.
Working with corners in stone veneer installation
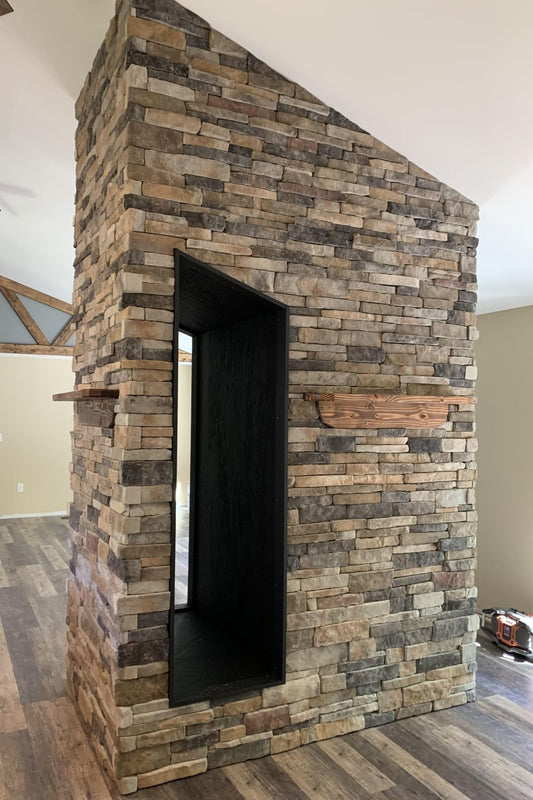
Corners play a critical role in both the structural performance and visual authenticity of a stone veneer installation. Properly installed corners create the illusion that the wall is constructed from full-depth stone rather than a thin veneer, which is essential for achieving a natural and professional appearance. Because corners define the lines of the wall and influence the alignment of the remaining stones, they are typically one of the first elements addressed during the installation process. For more guidance on proper corner techniques, see our stone veneer corners.
Manufactured stone veneer systems usually include specially designed corner pieces that wrap around the edge of the wall. These pieces alternate between long and short returns, allowing the veneer to extend naturally from one side of the corner to the other. When installed correctly, this alternating pattern mimics traditional stone masonry construction and prevents visible seams that could reveal the veneer system. Establishing this pattern early helps guide the layout of the wall and ensures that the surrounding stones align consistently as the installation progresses.
Working from the corners outward allows installers to maintain proper spacing and alignment throughout the wall surface. Once corner pieces are securely set, the field stones can be installed along each side while maintaining the natural pattern established by the corners. This approach helps prevent uneven courses, irregular joint spacing, or visual inconsistencies that could disrupt the finished appearance of the veneer.
Proper mortar coverage is especially important when installing corner pieces because they span two surfaces and must maintain strong adhesion on both faces of the wall. Corner stones are typically back-buttered with mortar and pressed firmly into place to create full contact with the prepared substrate. Ensuring adequate mortar coverage eliminates voids behind the stone and supports long-term stability, particularly in exterior manufactured stone veneer installations exposed to weather and temperature changes.
Careful planning is also required when corners intersect with architectural features such as window returns, columns, or fireplace surrounds. These areas often require precise stone placement and occasional trimming to maintain consistent joint spacing and visual balance. When handled properly, corners create clean transitions that reinforce the natural character of the stone veneer while supporting the structural integrity of the installation.
Because corners establish the visual framework for the entire wall, attention to detail during this stage is essential. Properly installed corner pieces help ensure that the stone veneer installation appears authentic, balanced, and professionally executed, contributing significantly to the overall quality and durability of the finished project.
Why you should lay out stone veneer before installation
Laying out manufactured stone veneer before installation is a simple but important step that helps ensure a more natural, balanced, and professional result. While the material is designed with variation in color and texture, that variation still needs to be controlled during installation to avoid unwanted patterns or color clustering on the wall.
As discussed in our why you should lay out manufactured stone veneer before installation post, a dry layout allows installers to see how stones work together before anything is permanently set. This makes it easier to evenly distribute colors, balance shapes, and decide where standout pieces should go. It is especially helpful around corners, edges, and focal points where placement has a big impact on the overall look.
Pre-planning also improves installation efficiency by reducing guesswork, minimizing unnecessary adjustments, and helping identify cuts in advance. The result is a smoother installation process and a more cohesive finished surface that feels intentional and natural rather than random.
Advanced installation strategies for large walls and complex corners
Large-scale walls, curved surfaces, and architectural corners present advanced challenges. For projects involving radius walls, columns, or arches, additional planning and specialized techniques are required. For a deeper dive into these methods, see our post on stone veneer on curved surfaces. Professionals typically plan stone layouts on the ground before installation, ensuring even distribution of color and profile. Curved walls and arches require selective cutting and careful placement to preserve visual consistency and structural security.
Multi-story installations often utilize scaffolding, leveling tools, and staged mortar application. In all cases, attention to course alignment, load distribution, and visual flow distinguishes professional-grade installations from amateur work.
Finishing touches in stone veneer installation
The final stage of a stone veneer installation involves completing the finishing touches that refine the appearance of the wall and ensure the installation performs as intended over time. While the primary structure of the veneer system is established during stone placement, the finishing phase focuses on joint detailing, surface cleaning, and overall visual balance. Attention to detail during this stage helps transform a properly installed wall into a polished architectural feature.
One of the most important aspects of finishing stone veneer is the treatment of mortar joints. In installations where visible joints are part of the design, mortar is carefully placed between the stones to fill gaps and create a cohesive, unified surface. Once the mortar begins to set, it is typically tooled or shaped to achieve a consistent joint profile that complements the selected stone style, whether smooth and subtle or more pronounced and rustic. Properly finished joints not only enhance the visual continuity of the installation but also serve a functional purpose by helping to shed water and protect the underlying mortar system from long-term moisture exposure. For guidance on achieving clean, consistent spacing and a professional finish, explore perfect grout lines for your stone veneer.
That said, mortar joints are not always required as part of the finished look. Many modern and contemporary applications favor a dry stacked aesthetic, where stones are tightly fitted together with minimal or no visible grout lines. This approach places greater emphasis on the natural variation in color, texture, and shadow within the stone itself, resulting in a cleaner and more streamlined appearance. You can explore this style further in our overview of the art of dry stacking.
Choosing between a grouted or dry stacked finish often comes down to both design intent and performance considerations. Factors such as stone profile, installation location, and environmental exposure can all influence which approach is most appropriate. If you want a more detailed breakdown of when grout should be used, when it can be omitted, and how each choice impacts durability and appearance, our post on does stone veneer need grout? explores those decisions in more depth.
Cleaning the stone surface is another essential finishing step. During installation, small amounts of mortar may remain on the face of the stone, particularly near joints or tight spaces. After the mortar has partially cured, these residues are gently removed using soft brushes or other appropriate cleaning methods. Careful cleaning ensures that the natural texture and color variations of the manufactured stone veneer remain clearly visible without damaging the surface.
Final inspection of the wall also plays an important role in the finishing process. Installers review the entire surface to ensure consistent alignment, balanced stone distribution, and uniform joint spacing. Any minor adjustments or touch-ups are completed during this stage to maintain the natural appearance that defines a high-quality stone veneer installation. This inspection also confirms that mortar coverage and stone placement meet professional standards for durability and performance.
In some installations, particularly those exposed to moisture or environmental wear, a breathable masonry sealer may be applied after the mortar has fully cured. Sealing helps protect the veneer from staining, water intrusion, and freeze–thaw damage while preserving the stone’s natural appearance. For detailed guidance, see how to seal and protect stone veneer.
When combined with proper cleaning and joint finishing, sealing can extend the lifespan of the veneer system and maintain its visual appeal.
These finishing touches bring the entire manufactured stone veneer installation together. By carefully completing joint work, cleaning the stone surface, and conducting a thorough final inspection, professionals ensure that the finished veneer not only looks refined and natural but also performs reliably for years in both residential and commercial applications.
Cold-weather and hot-weather installation considerations
Temperature and weather conditions significantly influence mortar curing and veneer adhesion. Cold-weather installation requires additives, insulated coverings, or temporary enclosures to prevent frost damage. Mortar and stone must remain above freezing until fully cured, and snow or ice exposure must be prevented. Hot-weather conditions can accelerate evaporation, leading to shrinkage or weak adhesion; shading, misting, or extended curing times are used to maintain proper moisture levels. Professionals continuously monitor these conditions and adjust installation methods to ensure optimal long-term performance.
Common installation challenges
Even professional installations face potential challenges. Improper substrate preparation, inconsistent mortar application, insufficient color blending, or poor course alignment can compromise both aesthetics and durability. Temperature extremes, moisture, and environmental exposure must be managed during installation to prevent adhesion failure or cracking. Professional quality control, adherence to manufacturer specifications, and rigorous planning mitigate these risks and ensure that stone veneer installations deliver consistent, high-end results.
When professional installation is recommended for stone veneer
Even though manufactured stone veneer is designed to be more installation-friendly than natural stone, many projects still benefit from professional expertise. Large-scale applications like full exterior cladding, commercial spaces, or installations involving complex wall systems often require precise planning, proper moisture barriers, and detailed flashing to ensure long-term durability. In these cases, professional installers help prevent common issues such as water infiltration, improper adhesion, or uneven finishes that can compromise both performance and appearance over time.
Projects that involve challenging conditions such as cold-weather installation, high-moisture environments, or integration with other building materials also demand a higher level of skill. Experienced installers understand how to adapt techniques to suit climate conditions, substrate requirements, and manufacturer specifications. If your project goes beyond a simple interior accent wall, it is worth exploring choosing a skilled stone mason for your project to better understand the process and when professional installation may be the right choice.
How to install manufactured stone veneer
Manufactured stone veneer continues to be one of the most versatile and practical materials used in modern construction and architectural design. By combining the timeless beauty of natural stone with lighter weight, lower structural demands, and more efficient installation, it allows professionals to achieve high-end finishes across a wide range of residential and commercial applications. From fireplaces and interior accent walls to exterior facades, landscape features, and large commercial installations, manufactured stone veneer delivers both visual impact and long-term durability.
Successful stone veneer installation depends on careful planning, proper surface preparation, and consistent installation practices. Evaluating substrates, estimating materials accurately, installing metal lath and scratch coats correctly, and using the appropriate mortar are all critical steps in building a reliable veneer system. Professional techniques such as proper stone placement, thoughtful color blending, precise cutting, and careful corner installation ensure that the finished surface maintains the natural character and architectural depth associated with traditional stone masonry.
Attention to finishing details, environmental conditions, and long-term protection further contributes to the longevity of the installation. Proper joint finishing, surface cleaning, and the use of breathable sealers where appropriate help preserve the appearance and performance of the stone veneer for many years. When these best practices are followed, manufactured stone veneer provides a durable and visually striking cladding system that withstands weather exposure, daily wear, and changing design trends.
For architects, builders, contractors, and property owners, manufactured stone veneer offers a reliable way to enhance the character and value of both interior and exterior spaces. With proper planning, professional installation techniques, and routine maintenance, stone veneer installations can maintain their beauty and structural integrity for decades, making them a lasting investment in architectural quality and design.
From Mountain View Stone: what you should know
At Mountain View Stone, we’ve worked with thousands of stone veneer projects, and one thing is clear: the key to a lasting, beautiful installation isn’t just the stone, it’s the preparation and professional technique behind it. Manufactured stone veneer offers the authentic look of natural stone with lighter weight and easier installation, but achieving long-term performance depends on proper substrate preparation, metal lath, scratch coat, and the right mortar. Planning the layout, blending colors, and carefully placing corners and cuts ensures a natural appearance that enhances both residential and commercial spaces. While DIY installations are possible for small accent walls, we strongly recommend consulting professionals for larger, complex, or exterior applications to protect your investment and ensure durability. Understanding these best practices will help your project look stunning and stand the test of time.
Frequently asked questions
1. How long does it take to install manufactured stone veneer? Most projects take 1-3 days depending on size and surface preparation. Larger exterior walls may require several days.
2. Can I install manufactured stone veneer over drywall? No. Drywall is not an approved substrate for stone veneer. You must prepare the surface properly with lath and scratch coat.
3. What type of mortar should I use for stone veneer? Type S mortar is most commonly recommended, but always follow manufacturer specifications for your specific product.
4. Do I need metal lath for stone veneer installation? Yes, metal lath is typically required when installing manufactured stone veneer over most surfaces to ensure proper adhesion and support. Masonry surfaces may not require lath if they are properly prepared, but you should always follow the manufacturer’s instructions to ensure a secure, long-lasting installation.
5. Can manufactured stone veneer be installed outdoors? Yes. It is designed for both interior and exterior use when installed according to manufacturer instructions and local building codes.
6. Should I hire a professional to install stone veneer? If you’re unfamiliar with masonry work, hiring a professional ensures proper installation and long-term durability. DIY installation is possible with careful preparation and attention to detail.
What's next?
Transform your space with stunning stone veneer! Shop now or order a sample to see the quality and beauty for yourself.
Have a question?
Please see our full terms of service or check out our frequently asked questions.
For general information and questions please call: (864) 882-8960 Mon. - Fri. 8am - 5pm (EST) or email: info@mountainviewstone.net we are more than happy to help you.
Or you can submit your questions via our contact us page.
We look forward to working with you on your upcoming project.
The Mountain View Stone Team
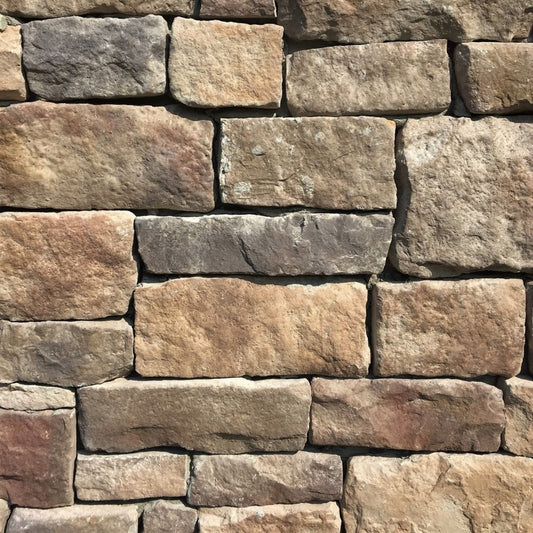
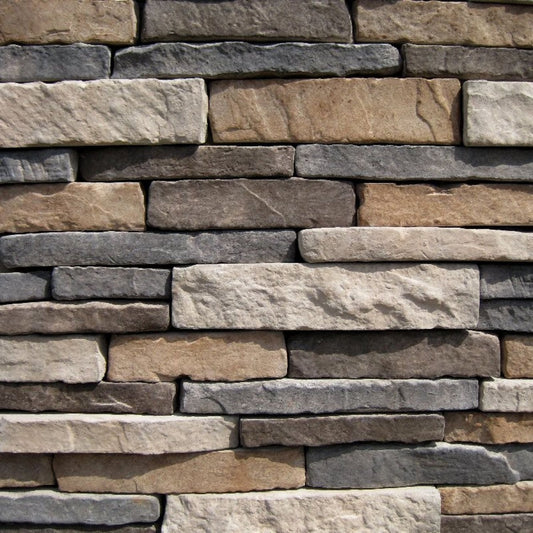
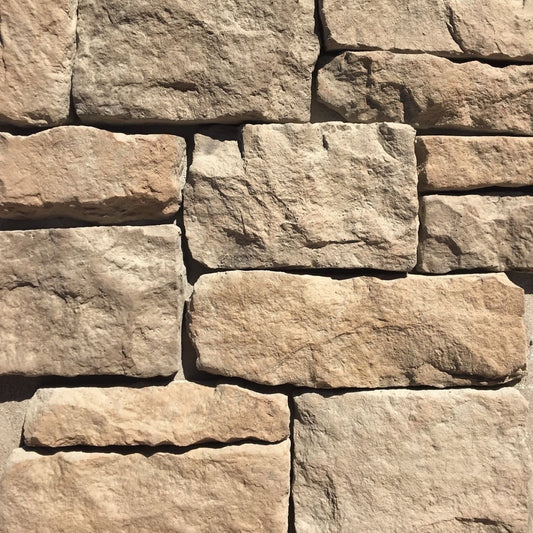
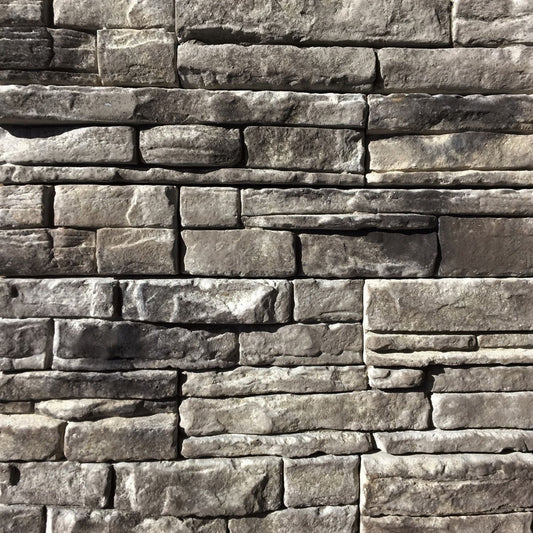
Pictured is lime stone tuscany.