DIY Stone Veneer Installation Guide: Tips, Tricks, and Common Mistakes
Share
Originally posted September 3, 2025, updated June 20, 2026.
Learn how to install manufactured stone veneer yourself with this complete DIY guide. From surface prep to finishing touches, create professional-looking stone features for your home.
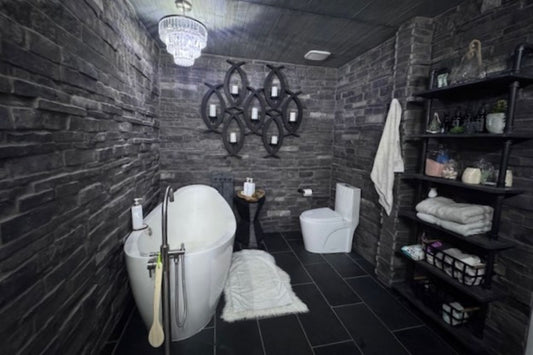
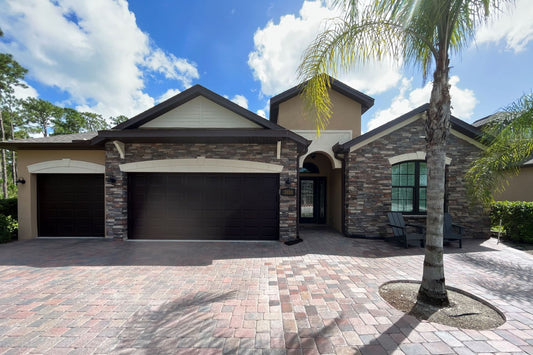
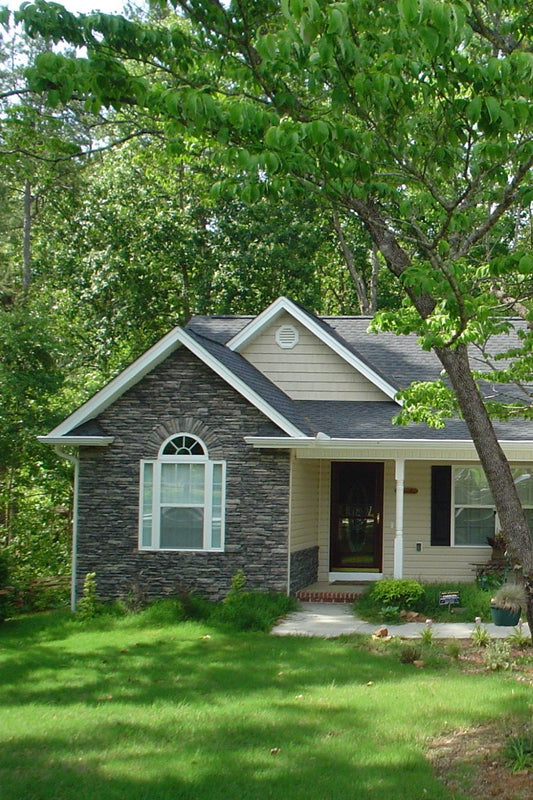
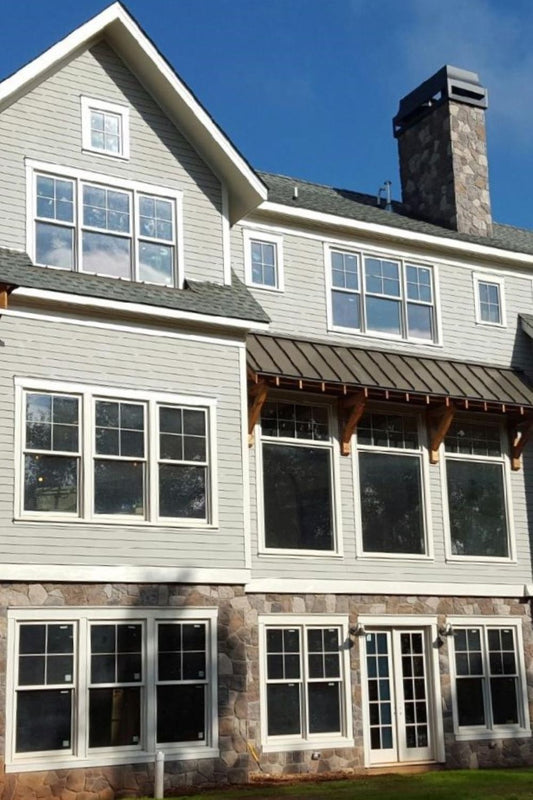
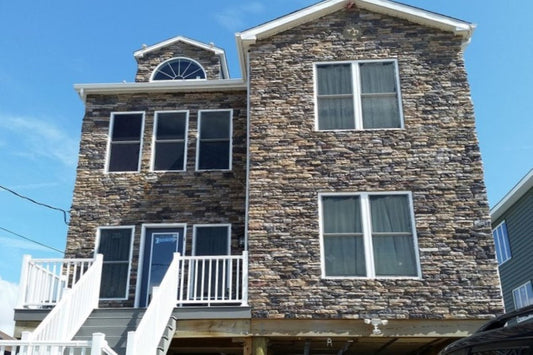
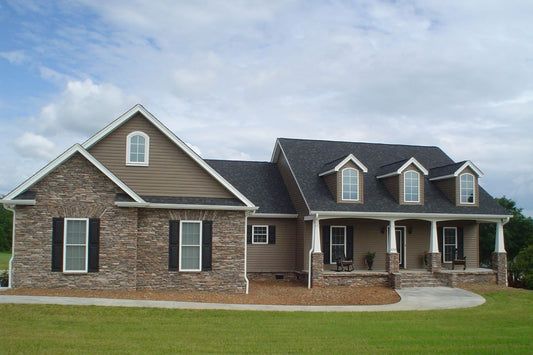
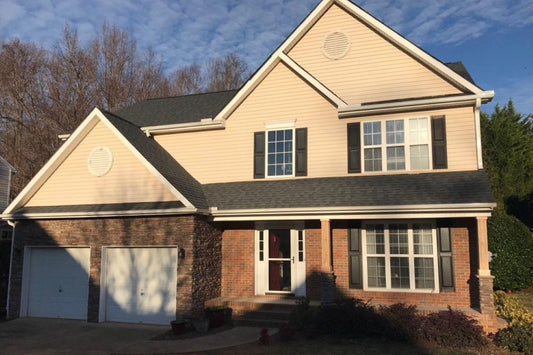
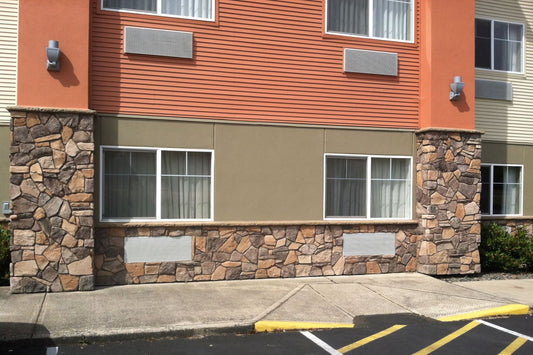
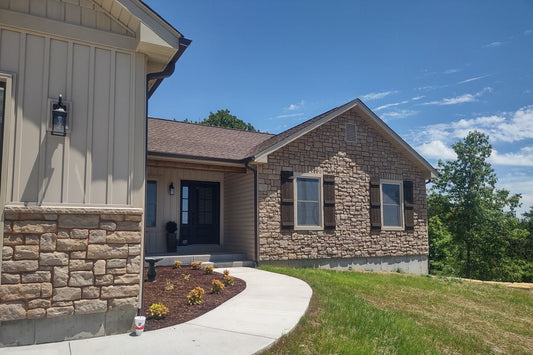
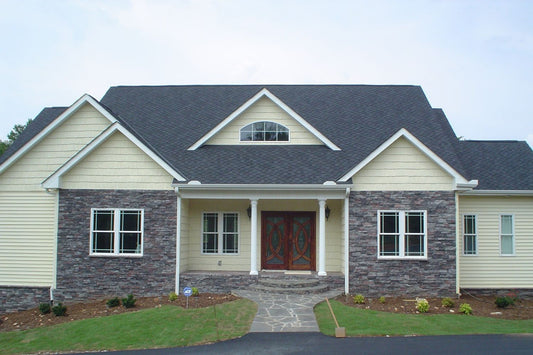
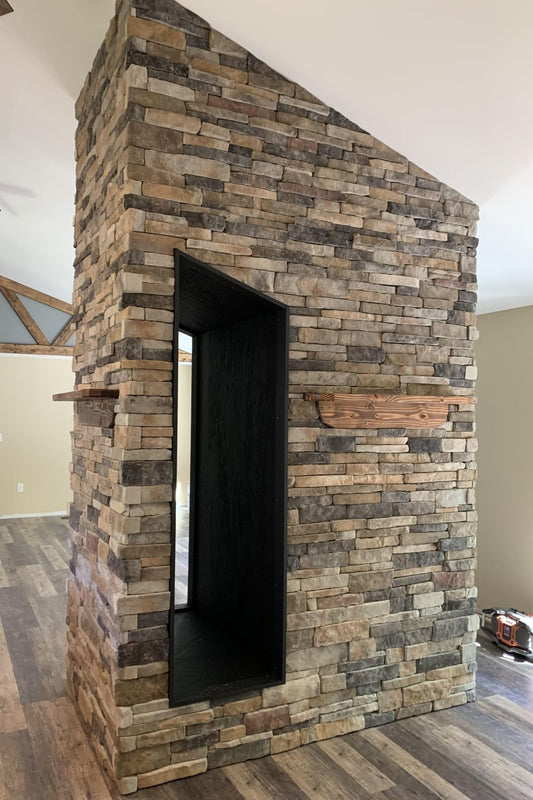
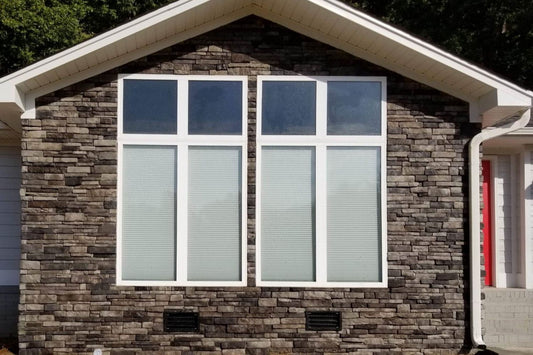
Installing manufactured stone veneer yourself is an achievable and rewarding project for homeowners looking to add the natural beauty of stone to their homes without the high costs, heavy lifting, or specialized equipment required for full-bed stone. This versatile material is not only lightweight and easier to handle than traditional stone, but it also comes in a wide range of colors, textures, and sizes that allow for creative design possibilities. Whether you are enhancing a fireplace, creating an accent wall, updating an exterior facade, or building an outdoor kitchen, manufactured stone veneer enables homeowners to achieve professional-looking results with patience, careful planning, and attention to detail.
The appeal of a DIY stone veneer project goes beyond cost savings. Homeowners gain the satisfaction of completing a project themselves, creating personalized spaces that reflect their style. A well-executed installation can transform ordinary walls into striking focal points that elevate the overall aesthetic of a room or exterior surface. In this guide, you will learn everything you need to know to complete a DIY stone veneer project, from selecting materials and preparing your wall to applying stones, troubleshooting common challenges, and maintaining your finished installation for years of enjoyment. By following these steps, even first-time installers can confidently create stunning, durable stone features that rival professional work.
Why manufactured stone veneer is DIY-friendly?
One of the main reasons manufactured stone veneer is an ideal choice for DIYers is its manageable weight. Unlike natural stone, which can be heavy and cumbersome, manufactured stone veneer is designed to be light enough for a single installer to handle safely and comfortably. This feature makes the process of lifting, cutting, and positioning stones far less physically demanding, which is especially beneficial for homeowners who are new to masonry work. Its uniform thickness and consistent sizing also simplify alignment and reduce the common frustrations associated with irregular natural stone.
The versatility of manufactured stone veneer is another reason it suits DIY projects. It can be installed over a variety of surfaces, including drywall, concrete, masonry, and properly prepared wood framing, making it applicable for both interior and exterior projects. This flexibility allows homeowners to tackle a range of installations, from accent walls and fireplaces to outdoor kitchens and garden walls, without needing specialized tools or equipment. Many manufacturers also provide detailed installation guides, instructional videos, and technical sheets, giving DIYers step-by-step instructions and visual support to build confidence in completing the project successfully.
If you’re wondering whether this is a beginner-friendly project, our post on is stone veneer hard to install? breaks down the skill level, tools, and challenges you should expect before getting started.
Beyond practicality, manufactured stone veneer also allows for creative freedom in design. Homeowners can mix colors, textures, and sizes to achieve a natural, authentic appearance that complements their home’s architecture. The consistent dimensions make it easier to experiment with layouts and patterns without worrying about fitting irregular stones, allowing even beginners to achieve professional-looking results. Additionally, the ease of handling and cutting reduces the risk of errors, which can save time and materials for a DIY project. Overall, these characteristics make manufactured stone veneer uniquely suited for homeowners eager to enhance their space with their own hands.
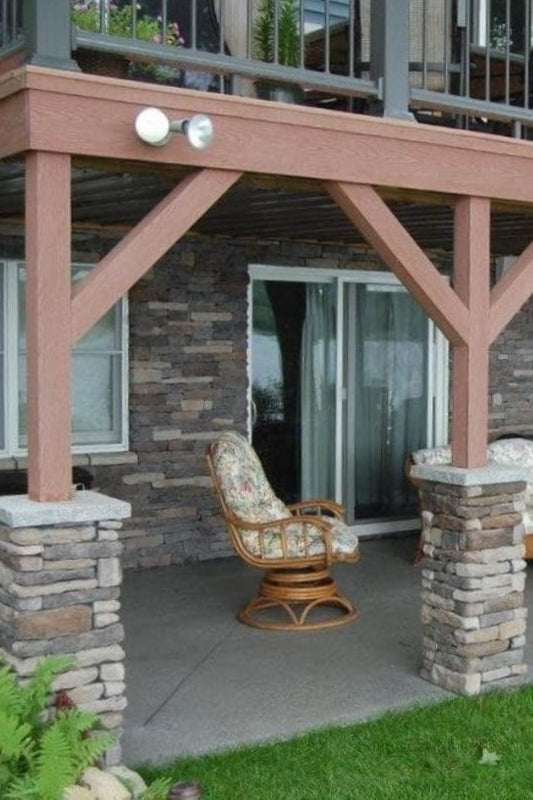
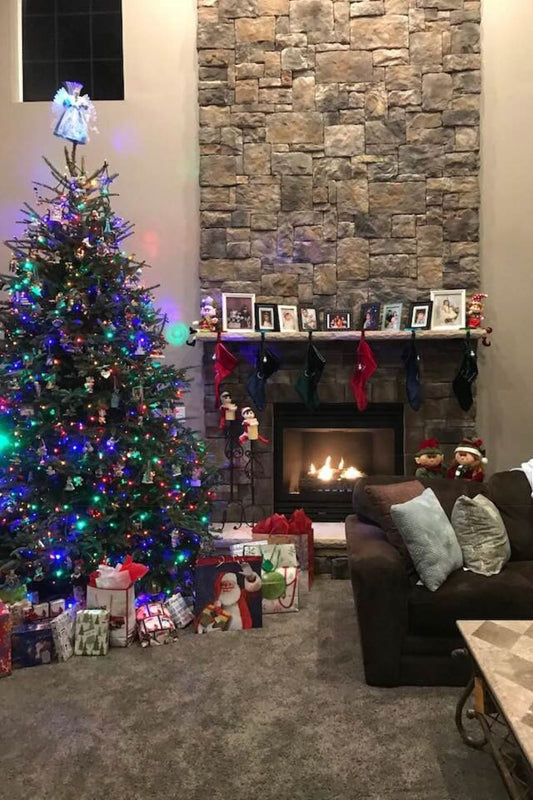
Fireplaces are one of the most common DIY upgrades, largely because they can instantly transform a room’s focal point without requiring a full renovation. Applying stone veneer to a fireplace surround is a popular project for homeowners, as it delivers a high-end, custom look while still being achievable with basic tools and careful preparation. For a step-by-step walk through of the entire process, see our post on how to install a stone veneer fireplace, where we break down surface prep, installation techniques, and finishing details to help you complete the project with confidence.
Planning and preparing for a DIY project
Careful planning and preparation are crucial for the success of any DIY stone veneer installation. Homeowners should first consider their skill level and experience with similar tasks. Those familiar with tiling, masonry, or general construction may find it easier to achieve a seamless, professional finish, while beginners should approach the project with patience and a willingness to follow manufacturer instructions closely. Regardless of experience, taking the time to plan layout, assess the substrate, and gather materials reduces the likelihood of errors and ensures a smoother installation process.
Having the right tools on hand is one of the most important factors in a successful DIY stone veneer project. From cutting and mixing mortar to setting and finishing each stone, the proper equipment makes the process smoother, more accurate, and far less frustrating for first-time installers. Taking time to prepare your tools before you begin can help avoid delays and ensure a more professional result. For a complete breakdown of everything you’ll need at each stage, see our post on tools needed to install manufactured stone veneer.
Surface preparation is perhaps the most important step in a DIY installation. Exterior walls, particularly those exposed to moisture, require a weather-resistant barrier, galvanized metal lath, and a scratch coat to ensure proper adhesion and long-term durability. Interior drywall installations should be reinforced with a suitable backing to support the stone's weight and prevent cracking or detachment over time. Inspecting the wall for moisture issues, structural weaknesses, or damage before beginning the project helps avoid costly mistakes that could compromise the finished result.
For many homeowners, documenting the wall with photographs and taking measurements before starting can provide a clear reference and assist with planning the layout effectively.
Selecting the appropriate tools and materials is equally important for a DIY installation. Essential tools include a trowel for spreading mortar, a level for maintaining even rows, cutting equipment such as a wet saw or angle grinder, and safety gear including gloves, goggles, and a dust mask. High-quality Type S mortar is recommended for both interior and exterior applications to ensure strong adhesion and long-lasting results. Homeowners should also plan for the time commitment required, recognizing that even small projects like a fireplace surround may take a full weekend, while larger exterior walls may require several days of work. Considering environmental conditions, such as temperature and humidity, further supports successful installation by preventing premature drying or moisture-related issues during curing.
Estimating material quantities
Accurately estimating the amount of stone veneer and mortar needed is essential to avoid running short or ending up with excessive waste. Many DIYers underestimate the materials required, particularly when accounting for corners, edges, and irregular cuts.
Start by calculating the total square footage of the installation area, measuring the height and width of each wall or surface. Include corners, as well as window and door edges, since these areas may require additional stones or specialized corner pieces.
It’s wise to purchase extra material to cover cuts, mistakes, or damaged stones. Adding a buffer allows for flexibility during installation and helps achieve a natural, cohesive layout without interruptions.
Mixing Type S mortar according to manufacturer instructions is critical for both performance and workability. Mortar that is too dry may not adhere properly, while overly wet mortar can slump or fail to support the weight of the stone. Preparing small batches at a time helps maintain consistency and reduces waste.
Stone veneer is typically sold in boxes containing multiple pieces. Buying full boxes makes it easier to mix colors and textures for a natural look, while individual stones can be purchased for patching, small projects, or custom layouts. Planning around box quantities usually saves time and ensures a uniform, professional finish.
By carefully assessing square footage, factoring in extra material, and understanding mortar and stone requirements, DIYers can confidently purchase the right materials and avoid common installation frustrations.
Planning the layout
The first step in any stone veneer project is careful layout planning, which serves as the foundation for a successful DIY installation.
Taking precise and accurate measurements of the installation area is essential, including height, width, and any architectural features such as windows, doors, or fireplaces. Accurate measurements help calculate the correct amount of stone veneer needed, prevent material waste, and ensure that stones fit properly without requiring excessive cutting. Measuring multiple points along the wall or surface accounts for any irregularities, ensuring that courses remain level and consistent. This attention to detail helps avoid uneven rows, awkward gaps, and misaligned stones that could compromise both the aesthetics and structural integrity of the installation.
Homeowners should take the time to study the visual flow of colors, textures, and stone shapes, deliberately mixing stones from multiple boxes to create a harmonious and natural appearance while preventing clusters of similar shades. Dry-fitting stones on the floor before installation provides a valuable opportunity to experiment with different arrangements, spacing, and alignment, allowing DIYers to make adjustments and refine the layout without committing to the wall prematurely. As explained in our why you should lay out manufactured stone veneer before installation post, this step helps ensure a more natural, balanced, and professional-looking finished result.
Considering how the stones will interact with corners, edges, and focal points, including situations that involve installing stone veneer on angled surfaces, ensures that the final design maintains balance and visual interest. Angled surfaces add another layer of complexity because the perspective changes how shadows, depth, and alignment are perceived. Stones may need to be adjusted or repositioned during layout to ensure they visually align when viewed from common sightlines. Taking the time to account for these shifts before installation helps avoid visual distortion and keeps the overall pattern consistent across all planes of the project. See our full post on how to install manufactured stone veneer on angled surfaces.
This pre-planning stage not only improves aesthetic outcomes but also streamlines the installation process, reduces wasted materials, and builds confidence for homeowners embarking on their first stone veneer project.
Surface preparation
Once the layout is planned, preparing the wall is critical. The substrate must be clean, dry, and structurally sound, and preparation varies depending on the material. Interior drywall requires reinforcement with cement board or metal lath to support the stone’s weight and prevent cracking. Cement board is ideal for moisture-prone areas like kitchens and bathrooms, but also requires a metal lath. Because metal lath requirements vary depending on the surface being covered, it is important to understand when it is needed and why it plays such an important role in a durable installation. See our post do you need metal lath for stone veneer installation?
on or a complete breakdown of when lath is required, when it may not be necessary, and how it supports the overall veneer system.
Concrete and brick surfaces should be cleaned thoroughly and lightly dampened to enhance mortar adhesion. Stucco walls must be inspected and repaired for stability before installation. Wood framing or siding should be covered with a weather-resistant barrier and securely fastened metal lath to prevent water damage and provide a strong bond. Exterior walls generally follow the same process with galvanized metal lath over a weather-resistant barrier, followed by a scratch coat of mortar allowed to cure for twenty-four to forty-eight hours. Proper substrate-specific preparation ensures the stone veneer is firmly anchored, durable, and maintains its appearance over time.
Mixing and applying mortar
Mixing mortar correctly is essential for a strong and durable installation. Only high-quality Type S mortar should be used; construction adhesive, glue, or other alternatives are not suitable and will not provide the necessary structural support or longevity. Choosing the right bonding method is essential for long-term durability. See our breakdown stone veneer installation: mortar or glue? to understand why mortar is the preferred option over adhesives.
Following the manufacturer’s instructions for consistency helps prevent slumping and cracking. Working in small sections prevents the mortar from drying too quickly, allowing stones to be positioned accurately. Choosing the right mortar is just as important as having the right tools. If you're deciding between the two most common masonry mortars, our post on Type N vs. Type S mortar for manufactured stone veneer installation explains why Type S is generally the recommended choice for manufactured stone veneer.
The back-buttering method, where a thin layer of mortar is applied to the back of each stone, enhances the bond with the substrate. Regular checks with a level maintain straight rows and consistent alignment. For panelized systems, staggering seams contributes to a natural, non-repetitive pattern, which is particularly important for DIY installations where uniformity can be challenging.
Why only Type S mortar should be used
While DIYers may be tempted to shortcut the installation process by using construction adhesive, glue, or other quick-fix bonding products, these alternatives are not suitable for stone veneer. Manufactured stone veneer is heavy and requires a strong, durable bond to the substrate to prevent slipping, cracking, or detachment over time. Type S mortar is specifically formulated to handle the weight of stone, provide proper adhesion, and accommodate minor wall movement without compromising structural integrity. For a deeper breakdown of mortar types and why Type S is the preferred choice, see our post on the best adhesive for installing stone veneer.
Using adhesives or glue can lead to failure within months, especially in high-moisture areas or exterior installations exposed to freeze-thaw cycles. DIY installers might be drawn to adhesive for perceived convenience or to avoid mixing mortar, but the risk of loose stones, wall damage, and costly repairs far outweighs the time saved. Following the manufacturer’s instructions and committing to proper Type S mortar application ensures a long-lasting, professional-quality installation that will maintain both safety and aesthetics.
Setting stones
Applying stones to the prepared surface requires careful placement and consistent pressure. Each stone should be pressed firmly into the mortar and slightly wiggled to ensure a mechanical bond. Stepping back periodically allows homeowners to evaluate the overall appearance and make adjustments as needed. Working from the bottom up maintains stability and prevents misalignment. Attention to spacing, joint size, and pattern is crucial to achieving a natural and professional look.
Cutting stones
Cutting stones can be intimidating for DIYers, but with the right techniques, it becomes manageable. Measure twice and cut slowly using a wet saw or an angle grinder with a diamond blade. Leftover pieces can be used to fill gaps or create custom shapes. Minor imperfections can enhance the natural look, so DIYers should focus on overall aesthetics rather than perfection. Safety precautions, such as gloves, goggles, and a dust mask, are essential during cutting to prevent injury. When adjustments are needed for tight fits or edges, our post can you cut stone veneer? explains the safest tools and techniques for clean, accurate cuts.
Working with corners and inside corners
Corners can be tricky in DIY stone veneer projects, particularly inside corners where two walls meet. Learn more about proper corner techniques in our stone veneer corners guide to achieve a seamless, professional look and strong structural stability.
Most manufacturers offer 90-degree outside corners, which are beneficial because they simplify installation, ensure a perfect right-angle alignment, and reduce the need for custom cutting or fitting, making the process more accessible for DIY homeowners.
When working with non-90 degree corners, curves, or rounded surfaces, custom cuts are often necessary. Carefully shaping stones to fit these angles or contours helps maintain a consistent, natural appearance while ensuring that the stones conform smoothly to the curved or irregular surface. See our complete post stone veneer on curved surfaces for more information.
Inside corners require particular attention to alignment. Dry-fitting stones along both intersecting walls before applying mortar helps homeowners determine the best arrangement and prevents gaps. Small adjustments in placement can prevent stones from jutting or leaving visible seams. For tight inside corners, stones may need to be cut at precise angles to maintain continuity and ensure a flush fit. Using scrap pieces and dry-fitting before mortaring allows DIYers to refine placement and avoid costly mistakes. Proper preparation and careful attention to corners not only improve aesthetics but also reinforce the structural integrity of the installation.
Finishing touches
Finishing touches are the final step in the installation process and are essential to achieve a professional look. Excess mortar should be cleaned promptly with a damp sponge to prevent hard-to-remove stains. Homeowners should step back frequently to assess the overall pattern and alignment. Once all stones are set, allowing the mortar to cure according to manufacturer recommendations, typically twenty-four to forty-eight hours, ensures proper bonding and stability. Applying a breathable, manufacturer-approved sealer is optional but recommended in areas exposed to moisture, spills, or outdoor elements, as it helps protect against staining and freeze-thaw damage.
Not all stone veneer installations require visible mortar joints, and in fact, many homeowners are drawn to the clean, seamless appearance of a dry stacked finish where the stones fit tightly together without any grout lines. This style has become especially popular in modern interior design and contemporary exterior applications because it highlights the texture, color variation, and natural character of the stone itself without the visual interruption of mortar. You can learn more about this approach in the art of dry stacking.
Choosing between grouted and dry stacked stone is not always straightforward, and it often comes down to both design preference and performance expectations. Factors such as the type of stone profile, the location of the installation, and exposure to moisture or temperature changes all play a role in determining the best method for your project. If you’re still weighing those decisions, our full post on does stone veneer need grout? breaks down exactly when grout is recommended, when it can be skipped, and how each option impacts durability, maintenance, and overall appearance. For a more detailed look at achieving clean, consistent spacing and a professional finish, explore perfect grout lines for your stone veneer.
How to seal and protect stone veneer
Sealing and protecting stone veneer is an important step that can prolong its life and maintain its appearance, particularly in areas exposed to moisture, spills, or harsh weather. A breathable, manufacturer-approved masonry sealer allows water to escape while preventing stains, dirt, and mildew from penetrating the stone. For step-by-step guidance, see our guide on how to seal and protect stone veneer. Before applying a sealer, ensure that the mortar has fully cured, which usually takes twenty-four to forty-eight hours for interior projects and longer for exterior walls depending on environmental conditions. Cleaning the surface thoroughly with mild soap and water removes loose debris, dirt, or mortar residue, creating a clean base for the sealer to adhere to.
Application should be done evenly using a brush, roller, or low-pressure sprayer, ensuring full coverage without leaving puddles or streaks. For high-moisture areas such as bathrooms, kitchens, or exterior walls, two coats may be necessary for optimal protection. Sealing should be repeated every few years to maintain durability, and homeowners should inspect stone veneer periodically for signs of wear or moisture intrusion. DIYers can also prevent damage by avoiding harsh chemical cleaners, abrasive scrubbing, or impact against the stone surface.
Outdoor installations and weather considerations
Installing stone veneer outdoors requires additional planning and care to ensure durability against the elements. Exterior installations are exposed to rain, wind, sun, and temperature fluctuations, all of which can affect mortar curing and the long-term performance of the veneer. Applying a proper weather-resistant barrier beneath the lath is essential to prevent moisture infiltration, which can cause damage during freeze-thaw cycles. Galvanized metal lath should be used for outdoor walls, and all fasteners should resist corrosion.
Cold-weather installations may require mortar additives designed for low temperatures, while hot, dry conditions may necessitate frequent misting to prevent mortar from drying too quickly and losing adhesion. Outdoor stone veneer should always be sealed with a breathable, water-resistant sealer once the mortar is fully cured, particularly in areas exposed to frequent rain or snow. Proper slope, drainage, and avoiding direct contact with soil also help prevent moisture issues. For a deeper understanding of why ground contact and moisture exposure are critical considerations, see our post on can stone veneer touch the ground?
Planning installation around favorable weather conditions and protecting unfinished walls from prolonged exposure ensures a long-lasting, professional-looking exterior veneer.
Common DIY mistakes and how to avoid them
Even experienced DIYers can encounter challenges during a stone veneer installation. Skipping surface preparation may result in loose stones, cracking, or moisture infiltration. Uneven mortar application can compromise adhesion, while inconsistent joint spacing can reduce structural stability and create an unprofessional appearance. Improperly cut stones may leave gaps or weak points in the wall, and sealing too early or using a non-breathable sealer can trap moisture, causing efflorescence or surface damage. Rushing any step of the process increases the likelihood of misaligned stones or uneven surfaces.
To avoid these common mistakes, homeowners should focus on careful planning, taking their time with each step, and following manufacturer instructions. Accurate measurements, consistent alignment, proper mortar application, and attention to curing times all contribute to a successful installation. DIYers should also embrace minor imperfections, as slight variations in joint spacing and stone placement often add to the natural, handcrafted appearance that characterizes stone veneer projects.
Tips for a successful DIY stone veneer project
Patience and attention to detail are the cornerstones of a successful DIY stone veneer installation. Homeowners should break the work into manageable sections, applying mortar and setting stones in small areas to maintain control over placement and consistency. Frequently stepping back to check alignment helps ensure that courses remain level and that color distribution is visually balanced. Safety should not be overlooked; gloves, goggles, and dust masks protect installers during cutting, mixing, and shaping. Additionally, reusing leftover cut pieces can help fill gaps, create natural patterns, and reduce waste.
Environmental considerations also impact installation success. Cold weather, high humidity, or direct sunlight can affect mortar curing, so planning installation around favorable conditions is essential. In areas exposed to moisture or freeze-thaw cycles, applying a breathable sealer after curing extends the life and appearance of the stone veneer. By combining careful preparation, methodical installation, and attention to environmental factors, homeowners can achieve a durable, professional-looking result.
DIY maintenance and care
Maintaining a DIY stone veneer installation is relatively straightforward. Regular cleaning with mild soap and water removes dust, dirt, and minor stains without damaging the surface. Homeowners should inspect the installation periodically to identify loose stones or minor cracks that may require attention. Applying a breathable sealer every few years, particularly for exterior walls or high-use areas, helps protect the stone from moisture, staining, and freeze-thaw damage. Avoiding heavy impacts, scraping, or abrasive cleaning methods preserves the integrity and aesthetic appeal of the installation over time.
When to hire a professional stone mason for your stone project
While many manufactured stone veneer projects are approachable for confident DIYers, there are situations where hiring a professional stone installer or mason is the smarter and safer choice. Complex applications such as full exterior facades, multi-story installations, structural walls, or areas exposed to heavy moisture like foundations, chimneys, and water features require a higher level of expertise. Proper surface preparation, moisture management, flashing details, and installation techniques are critical to long-term performance, especially in climates with freeze-thaw cycles. Mistakes in these areas can lead to costly repairs, water intrusion, or premature failure.
DIYers should also consider bringing in a professional when working with intricate designs, custom cuts, tight corners, or when blending multiple materials. A skilled mason not only ensures the installation meets building codes but also delivers a higher-end finished look with consistent joint spacing, natural patterning, and secure adhesion. If you are unsure whether your project falls into this category, it is worth reviewing choosing a skilled stone mason for your project to understand what to look for and how to ensure your investment is done right the first time.
DIY stone veneer installation guide
DIY stone veneer installation is an accessible and rewarding project for homeowners willing to invest time, patience, and attention to detail. By planning carefully, preparing surfaces properly, using the correct tools, and following manufacturer instructions, DIYers can create professional-looking stone features that enhance the beauty and value of their home. Whether installing a fireplace surround, accent wall, or exterior siding, manufactured stone veneer provides an achievable, cost-effective, and visually stunning solution for a variety of projects. Homeowners are encouraged to start small, take their time, and enjoy the process of bringing natural stone aesthetics into their living spaces. Ordering samples, visualizing the layout, and following the steps outlined in this guide will give confidence to complete a project that looks and lasts like professional work.
From Mountain View Stone: what you should know
At Mountain View Stone, we’ve seen firsthand that successful DIY stone veneer installations come down to preparation, patience, and respecting the process from start to finish. Manufactured stone veneer is one of the most approachable ways for homeowners to transform a space, but it still requires proper surface preparation, correct mortar selection, and careful attention to layout and alignment if you want results that last. The most common issues we see in DIY projects usually stem from rushing key steps like substrate prep or stone layout, rather than the installation itself being overly complex. When homeowners take the time to plan properly, dry-fit their stones, and follow manufacturer guidelines closely, they are often surprised at just how professional the finished result can look. Whether you’re working on a fireplace, accent wall, or exterior facade, the key is to treat each phase as equally important, because the quality of the final installation is always determined long before the first stone is set.
Frequently asked questions
1. Can I install manufactured stone veneer myself, or do I need a professional? Manufactured stone veneer is designed to be DIY-friendly, thanks to its lightweight nature and straightforward cutting and installation process. Many homeowners successfully complete interior accent walls, fireplaces, or small exterior projects themselves. However, for larger-scale exterior walls, complex corners, tall columns, or projects in extreme climates, hiring a professional stone mason ensures proper surface preparation, mortar application, and long-term durability.
2. What tools do I need to install stone veneer at home? DIY stone veneer projects typically require basic masonry tools, including a trowel, level, hammer, and a cutting tool such as a wet saw or angle grinder with a diamond blade. Safety gear like gloves, goggles, and a dust mask are essential when cutting or shaping stones. While panelized stone veneer systems can simplify installation, traditional individual stone pieces allow for a more natural, custom finish.
3. How long does it take to install stone veneer on a wall or fireplace? The time required depends on the size and complexity of the project. Small interior projects, such as a fireplace surround or accent wall, can often be completed in a weekend. Larger exterior walls or multi-story projects may take several days to a week, particularly for beginners. Proper planning, including dry-fitting stones and preparing the surface, can reduce mistakes and improve efficiency.
4. Do I need to seal my stone veneer after installation? Sealing is not always necessary, but applying a breathable, manufacturer-approved sealer can provide added protection against moisture, stains, and freeze-thaw damage, especially for outdoor installations or areas exposed to spills, grease, or high humidity. Avoid glossy, non-breathable sealers that can trap moisture, which may cause efflorescence or surface damage over time.
5. What are common mistakes to avoid in a DIY stone veneer project? Common errors include skipping surface preparation, using the wrong mortar or adhesive, inconsistent joint spacing, cutting stones incorrectly, or failing to follow manufacturer instructions. These mistakes can lead to uneven surfaces, poor adhesion, moisture issues, or reduced durability. Taking the time to plan your layout, prepare the substrate properly, and install carefully ensures a professional-looking and long-lasting finish.
6. Can stone veneer be installed over existing walls or surfaces? Yes, manufactured stone veneer can often be applied over existing concrete, masonry, or framed walls. However, interior drywall and exterior siding require proper backing, such as a metal lath and scratch coat, to ensure adhesion and prevent moisture damage. Following the manufacturer’s guidelines for each surface type is critical for achieving a stable, durable installation.
What's next?
Transform your next project with premium manufactured stone veneer. Shop now to bring your design vision to life with confidence or order a sample to see the realistic texture and vibrant colors firsthand.
Have a question?
Please see our full terms of service or check out our frequently asked questions.
For general information and questions please call: (864) 882-8960 Mon. - Fri. 8am - 5pm (EST) or email: info@mountainviewstone.net we are more than happy to help you.
Or you can submit your questions via our contact us page.
We look forward to working with you on your upcoming project.
The Mountain View Stone Team
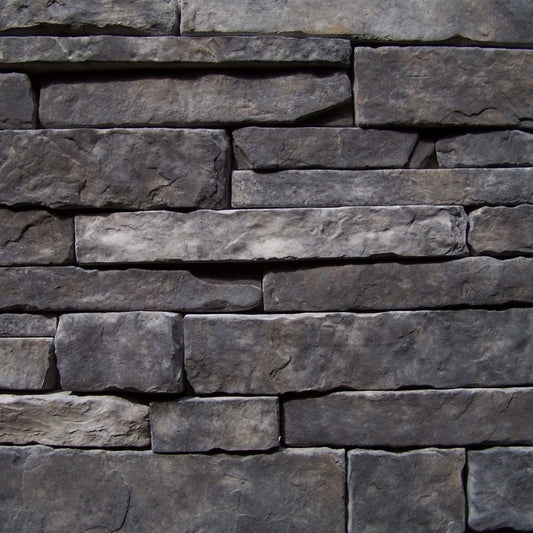
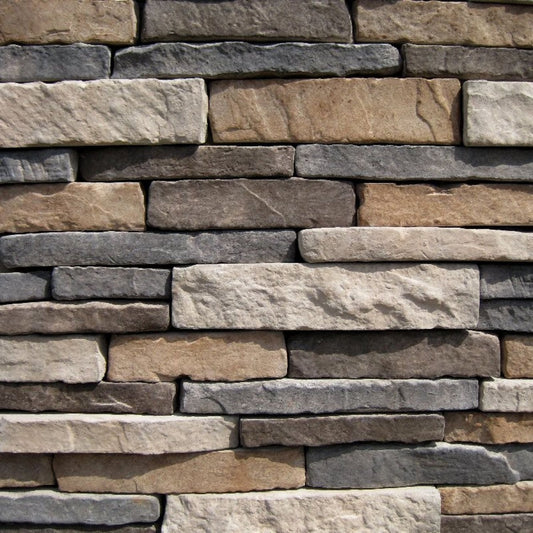
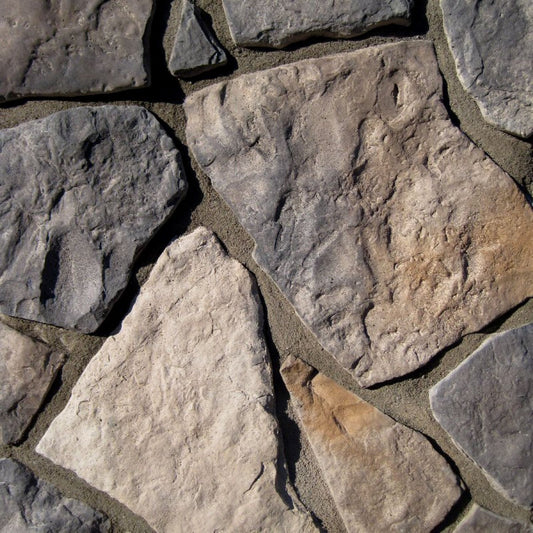
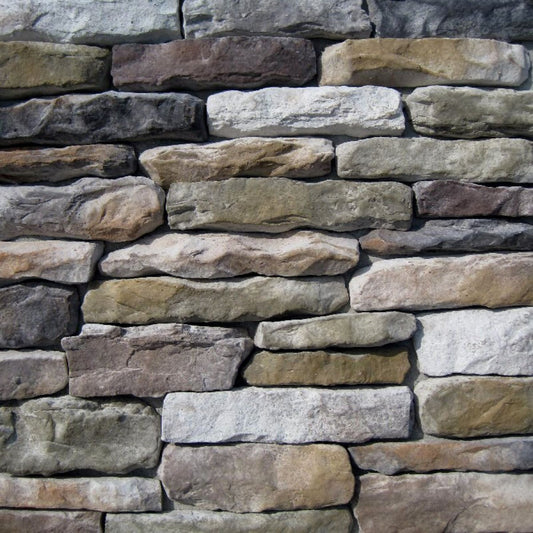
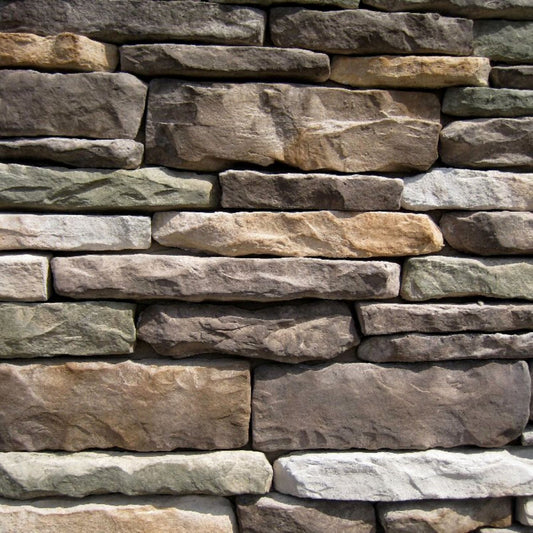
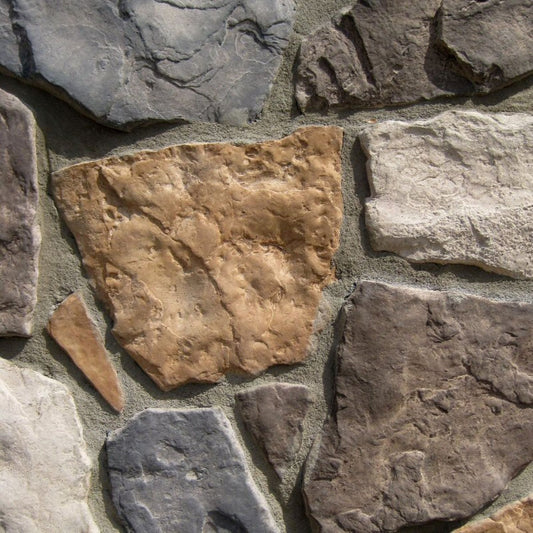
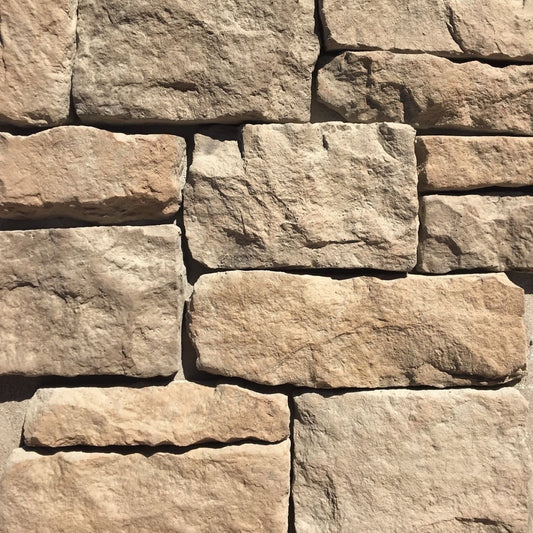
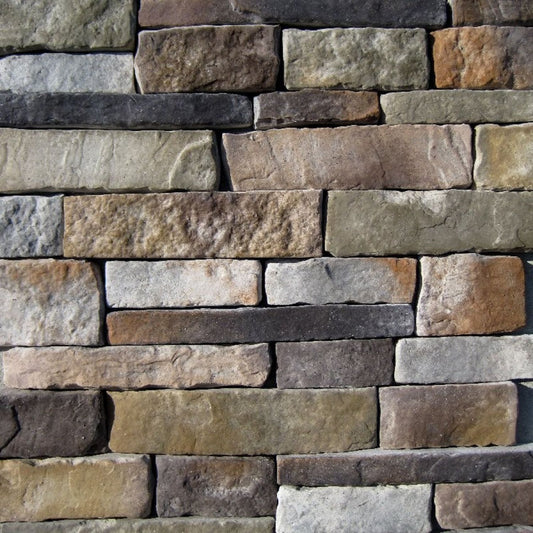
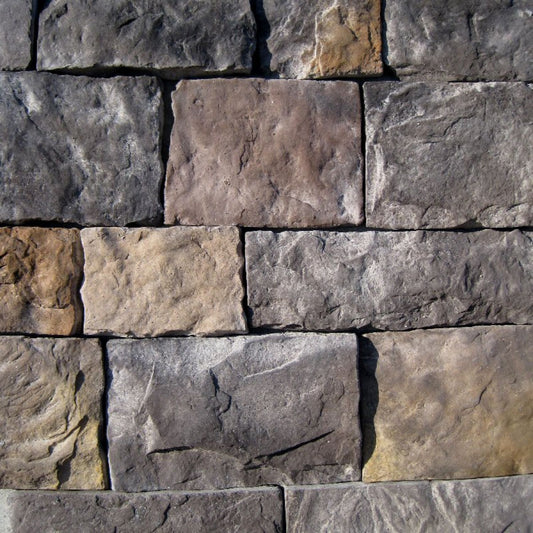
Pictured is lime stone kona.