
How to Clean and Finish Manufactured Stone Veneer After Installation: Curing, Cleanup, and Care
Share
After installing manufactured stone veneer, finish the project by properly curing the mortar, tooling the joints, removing excess mortar, and carefully cleaning the stone surface.
Installing manufactured stone veneer is only part of the process. Once the veneer is placed and the mortar joints are filled, the project still needs to be properly finished. Our complete guide to finishing manufactured stone veneer covers the essential steps, including cleaning the stone, allowing the mortar to cure, tooling the joints, and removing excess mortar, all of which contribute to the final appearance and long-term performance of the installation.
The finishing stage is also when some of the most common mistakes can occur. Mortar that is left on the face of the stone can become increasingly difficult to remove as it hardens. Cleaning too aggressively can damage the appearance of the veneer, while improper joint finishing can make an otherwise well-installed wall look uneven or inconsistent.
Understanding how to finish manufactured stone veneer after installation helps protect the appearance of the finished project while allowing the mortar to develop properly. The specific installation should always follow the manufacturer's instructions and applicable building requirements, but several basic principles apply to most manufactured stone veneer installations.
Cleaning Manufactured Stone Veneer After Installation
Cleaning should be approached carefully because the goal is to remove loose mortar, dust, and construction residue without damaging the surface of the manufactured stone veneer. The easiest time to deal with excess mortar is during installation, before it becomes firmly hardened.
As the work progresses, mortar that gets onto the face of the veneer should be removed promptly and carefully. A mason's brush or other appropriate soft-bristled brush can be used to remove loose material without aggressively scrubbing the surface. Mortar should not simply be allowed to accumulate on the face of the stone with the expectation that it can easily be washed away later.
Once the mortar has hardened, aggressive cleaning methods can create more problems than they solve. Manufactured stone veneer should not be treated like a concrete floor or masonry surface that can simply be pressure-washed or aggressively scrubbed. Avoid wire brushes, harsh abrasive cleaning methods, and acidic cleaners unless the specific manufacturer expressly approves them for the product.
Water can also be used carefully during cleanup, but excessive water or high-pressure washing immediately after installation can interfere with fresh mortar and create unnecessary mess. For routine cleaning after the installation has properly cured, a gentle approach is generally preferable.
If a cleaning product is considered necessary, test it on an inconspicuous area first. The finished appearance of manufactured stone veneer depends partly on its surface coloration, so cleaning methods should be selected with the actual veneer product in mind.
Curing Manufactured Stone Veneer After Installation
Strictly speaking, the manufactured stone veneer itself does not cure after installation. The mortar used to install and grout the veneer is the material that needs time to cure and develop its strength.
Curing is an important part of the installation process because the mortar needs adequate time and appropriate conditions to harden properly. Temperature, moisture, wind, sun exposure, and the particular mortar mix can all affect curing conditions. The manufacturer's installation instructions should therefore take priority over generic curing recommendations.
During the curing period, the newly installed veneer should be protected from conditions that could interfere with the mortar. Excessive drying, freezing temperatures, heavy rain, or other adverse conditions can affect fresh mortar before it has properly developed.
Avoid treating a newly installed wall as though it is immediately ready for aggressive cleaning or other finishing work. The mortar joints need time to firm up, and the installation should be protected according to the applicable installation requirements.
It is also important to distinguish curing from simply waiting for the surface to look dry. Mortar can appear dry on the outside while the material underneath is still developing strength. Following the manufacturer's specified curing procedures provides a much better result than relying only on appearance.
How to Finish Mortar Joints on Manufactured Stone Veneer
Mortar joints have a major influence on the appearance of manufactured stone veneer. The same stone profile can produce dramatically different visual results depending on the amount of mortar visible between the stones and how those joints are finished.
After the mortar has been placed in the joints, it should be allowed to firm up before being tooled. Tooling the mortar too early can smear wet mortar onto the face of the stone and disturb the joint. Waiting until the mortar has reached the appropriate consistency allows the installer to shape the joint without pulling excessive material from the joint.
The joint can then be tooled with an appropriate mortar jointing tool to create the desired finish. The goal is to produce consistent, properly compacted joints while keeping excess mortar off the face of the veneer.
The appearance of the finished joint should complement the particular stone profile. Some installations call for more visible mortar, while others use narrower joints that place greater emphasis on the individual stones. The joint treatment should be consistent throughout the installation rather than changing noticeably from one section to another.
Mortar should also be kept from creating an artificial-looking outline around every individual stone. A natural-looking installation generally comes from maintaining appropriate joint depth, consistent workmanship, and a deliberate distribution of stone shapes and colors.
For this reason, finishing mortar joints is not simply a cleanup step. It is an important part of the final design of the wall.
Finishing the mortar joints is one of the final steps in the overall installation process. For homeowners who are completing the project themselves, our DIY stone veneer installation guide covers the installation process from surface preparation through placing and finishing the veneer.
How to Remove Excess Mortar From Manufactured Stone Veneer
Removing excess mortar is easiest when the material is still workable. During installation, installers should avoid allowing large amounts of mortar to dry on the face of the stone. Small amounts of residue can often be carefully brushed away once the mortar has firmed up sufficiently.
If mortar has hardened on the veneer, removal becomes more difficult. Scraping aggressively can damage the surface, while wire brushes and abrasive tools can alter the appearance of the stone. The objective should be to remove the mortar without unnecessarily disturbing the manufactured surface.
A common mistake is trying to solve hardened mortar residue with increasingly aggressive cleaning methods. This can turn a small mortar cleanup problem into a surface-finish problem. If substantial hardened mortar remains on the veneer, the safest approach is to consult the manufacturer's cleaning recommendations before using chemical cleaners, mechanical tools, or pressure washing.
Acid-based cleaners deserve particular caution. They can react with cement-based materials and may affect the appearance of the veneer, surrounding masonry, mortar, landscaping, or other finished surfaces. They should never be used simply because they are commonly associated with masonry cleaning.
For difficult residue, professional masonry cleaning may be appropriate, particularly when the veneer covers a large exterior wall or the mortar has been allowed to harden extensively. Always test a proposed cleaning method in a small, inconspicuous area first.
Avoiding Damage During Final Cleanup
The final cleanup should improve the appearance of the installation rather than create a new problem. Manufactured stone veneer is designed to replicate the appearance of natural stone, and its surface coloration and texture are important parts of that appearance.
Avoid wire brushes, harsh abrasives, and unnecessarily aggressive pressure washing. A pressure washer, if appropriate for a fully cured installation, should be used cautiously and with the proper wide fan spray and distance from the surface. High-pressure water should never be directed aggressively at fresh mortar joints.
Cleaning chemicals should also be selected carefully. Do not assume that a product labeled for masonry is automatically appropriate for manufactured stone veneer. Always follow the veneer manufacturer's recommendations and test the product before applying it across the entire installation.
The best cleanup is usually the cleanup that requires the least aggressive intervention. Good installation practices, timely mortar removal, and proper joint tooling can prevent many difficult cleaning problems before they occur.
What to Do After the Mortar Has Cured
After the mortar has cured according to the applicable installation requirements, inspect the entire installation from different distances and angles. Look for areas where mortar joints need attention, where residue remains on the stone, or where small amounts of construction debris need to be removed.
This is also a good time to evaluate the overall appearance of the installation. Manufactured stone veneer is intended to have natural variation in color, size, shape, and texture. The finished wall should not look artificially uniform, but mortar joints should still have a consistent and intentional appearance.
If a sealer is being considered, remember that sealing is optional for many manufactured stone veneer applications and should not be treated as a substitute for proper installation. If a sealer is used, a breathable, non-glossy penetrating product is generally preferable, and the product should always be tested before widespread application.
The finished veneer should also be maintained according to the manufacturer's recommendations. Proper installation, careful initial cleanup, and appropriate long-term maintenance work together to preserve the appearance of the project.
The finishing process is much easier when the veneer has been installed correctly from the beginning. For a more detailed look at proper installation practices, see our complete guide, how to install manufactured stone veneer like a pro, which covers the key considerations for achieving a professional-looking finished installation.
How to Clean and Finish Manufactured Stone Veneer After Installation
Finishing manufactured stone veneer after installation is not one single task. It is a series of steps that includes allowing the mortar to cure properly, finishing the joints, removing excess mortar, and cleaning the stone without damaging its surface.
The most important principle is to avoid trying to correct installation residue with overly aggressive cleaning methods. Good workmanship during installation makes the finishing process much easier. Removing excess mortar while it is manageable, tooling joints at the appropriate stage, and following the manufacturer's curing and cleaning instructions can help produce a finished installation that looks intentional and remains attractive for years.
When questions arise about curing times, cleaning products, mortar joint treatment, or difficult mortar residue, the manufacturer's specific installation instructions should take precedence. Manufactured stone veneer products can differ, and the correct finishing procedure should always be based on the product being installed and the conditions of the project.
From Mountain View Stone: What You Should Know
From Mountain View Stone, we recommend treating the period after installation as an important part of the overall project. Allow the mortar to cure according to the installation requirements, remove excess mortar carefully, and avoid aggressive cleaning methods that can damage the surface of the manufactured stone veneer. Our products are surface-colored, so preserving the texture and finish of the stone is especially important during cleanup. If you are unsure about a cleaning method, sealer, mortar treatment, or other finishing step, always consult the manufacturer's recommendations before proceeding.
Frequently Asked Questions About How to Clean and Finish Manufactured Stone Veneer After Installation
How soon can manufactured stone veneer be cleaned after installation?
Initial cleanup should take place during installation and before mortar becomes firmly hardened. More extensive cleaning should wait until the mortar has properly cured according to the manufacturer's instructions. Avoid aggressive cleaning methods while the mortar is still fresh.
Does manufactured stone veneer need to cure?
The manufactured stone veneer itself does not cure after installation. The mortar used to install and grout the veneer needs time to cure and develop strength. Proper curing conditions are important for the finished installation.
How do you finish mortar joints on manufactured stone veneer?
Mortar joints are generally allowed to firm up before being tooled with an appropriate jointing tool. The mortar should be compacted and shaped consistently while keeping excess material off the face of the stone. The desired joint appearance depends on the stone profile and project design.
How do you remove dried mortar from manufactured stone veneer?
Dried mortar should be removed carefully to avoid damaging the surface of the veneer. Avoid aggressive scraping, wire brushes, and harsh chemicals unless specifically approved for the product. For substantial hardened residue, consult the manufacturer's cleaning instructions or a masonry professional.
Can you pressure wash manufactured stone veneer after installation?
Pressure washing should not be used on fresh installations. Once the mortar has properly cured, limited pressure washing may be appropriate for some applications, but it should be performed cautiously using the proper spray pattern and pressure. Always follow the manufacturer's recommendations.
Should manufactured stone veneer be sealed after installation?
Sealing is optional for many applications and is not required simply because the veneer has been installed. If a sealer is desired, use a breathable, non-glossy penetrating product that is appropriate for manufactured stone veneer and test it on an inconspicuous area first.
What's Next?
Ready to transform your space? Shop now or order a sample to see the color, texture, and quality of our manufactured stone veneer for yourself.
Have a Question?
Please see our full terms of service or check out our frequently asked questions.
For general information and questions please call: (864) 882-8960 Mon. - Fri. 8am - 5pm (EST) or email: info@mountainviewstone.net we are more than happy to help you.
Or you can submit your questions via our contact us page.
We look forward to working with you on your upcoming project.
The Mountain View Stone Team
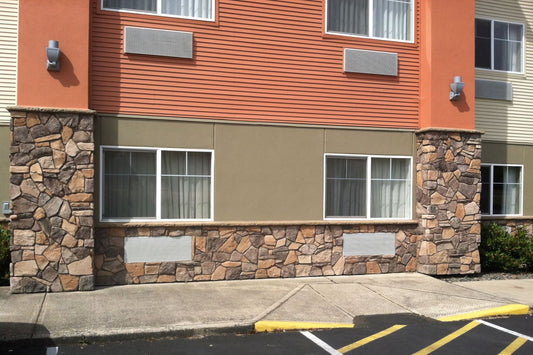
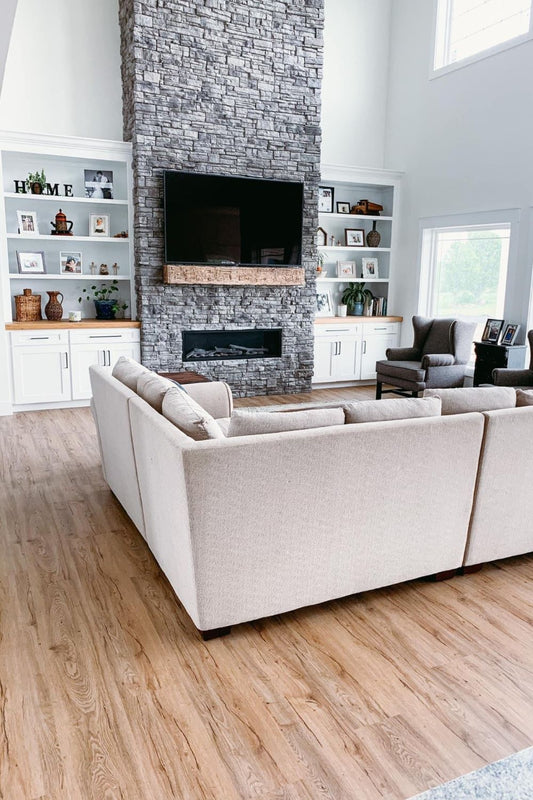
Pictured is an AI generated image of finishing a stone veneer installation.