
Finishing Manufactured Stone Veneer: A Complete Guide
Share
Finishing manufactured stone veneer involves completing mortar joints, installing architectural accessories, cleaning excess mortar, allowing the installation to cure properly, and applying compatible decorative or protective finishes when appropriate. The finishing process can include tooling mortar joints, installing stone veneer sills and corners, adding capstones or hearthstones, and creating specialty looks such as German smear or limewash. Proper finishing helps create a clean, professional appearance while protecting the veneer and completing the architectural details of the project.
Installing manufactured stone veneer does not end when the last stone is placed on the wall. The finishing stage is what brings the installation together and turns an arrangement of individual veneer pieces into a completed architectural feature.
Finishing manufactured stone veneer can involve several different processes depending on the type of installation, the stone profile, and the appearance you want to achieve. Mortar joints may need to be filled and tooled. Excess mortar may need to be carefully removed from the stone faces. Corners, sills, capstones, hearthstones, and other stone veneer accessories may be required to complete architectural transitions. A project may also call for a decorative treatment such as a German smear or limewash.
The finishing process is therefore much broader than simply cleaning mortar from the surface.
A well-finished stone veneer installation should look intentional from every angle. The joints should complement the stone rather than compete with it. Outside corners should transition naturally. Window openings should have an appropriately finished edge. The tops of walls and columns should be properly capped. Fireplace installations should have an appropriate hearth treatment. And the stone surface itself should be free from unnecessary mortar residue.
Finishing also requires patience. Mortar needs to reach the right consistency before it is tooled, and the completed installation needs sufficient time to cure before certain cleaning or protective treatments are performed. Rushing these steps can create problems that are difficult to correct once the mortar has hardened.
This guide explains how to finish manufactured stone veneer from the final stages of installation through architectural accessories, mortar joints, cleaning, curing, and decorative finishing techniques.
What Does Finishing Manufactured Stone Veneer Mean?
Finishing manufactured stone veneer refers to the work that completes the appearance and function of a stone veneer installation after the primary stone placement has been completed.
For some projects, finishing may be relatively simple. A tight-fitted stone profile may require careful removal of excess mortar and a final inspection of the stone surface. Other installations may involve substantial visible mortar joints that need to be filled, tooled, and cleaned.
Architectural details can add another layer to the finishing process. Stone veneer sills can finish the bottom of window openings. Corner pieces can create a convincing transition around outside corners. Capstones can finish the top of walls, columns, and other features. Hearthstones can complete fireplace installations. Trim stones, keystones, light-box trim, outlet trim, and other accessories can provide finished transitions around architectural and utility features.
Decorative treatments can also change the finished appearance. A German smear can create a heavily textured, old-world masonry appearance by working mortar across portions of the stone surface. Limewashing can create a lighter, weathered appearance while allowing some of the underlying stone character to remain visible.
These are all different applications, but they share the same underlying objective: completing the stone veneer installation so that the finished surface looks deliberate, cohesive, and appropriate for the design.
Why the Finishing Stage Matters
The final appearance of manufactured stone veneer depends on more than the color and profile of the stone. The relationship between the stones, mortar, architectural details, and surrounding materials has a major influence on how the completed project looks.
Mortar joints are one example. Two installations using exactly the same stone can look completely different depending on the width, depth, color, and tooling of the joints. A more recessed joint can emphasize individual stones, while a fuller joint can create a heavier masonry appearance.
The same principle applies to architectural transitions. A wall covered in beautiful manufactured stone veneer can still look unfinished if the stone simply stops awkwardly at a window, door, outside corner, or wall top.
Finishing accessories solve many of these visual transitions. They provide purpose-designed pieces that can make the transition from one architectural feature to another look intentional rather than improvised.
This is why finishing should be considered during the design and planning stages rather than after the stone has already been ordered. Knowing where sills, corners, capstones, hearthstones, and other accessories will be used can influence quantities, layout, installation sequence, and the overall appearance of the project.
When Should Manufactured Stone Veneer Mortar Joints Be Finished?
Timing is one of the most important parts of finishing manufactured stone veneer.
Mortar should not be too wet when it is tooled. If it is still soft and fluid, tooling can smear the mortar onto the faces of the stone and disturb the joint rather than shaping it cleanly.
At the same time, mortar should not be allowed to become completely hard before finishing begins. Once mortar has hardened substantially, shaping and correcting the joint becomes more difficult.
The ideal timing depends on conditions at the job site. Temperature, humidity, wind, substrate conditions, mortar composition, and the absorption characteristics of the materials can all influence how quickly mortar reaches the appropriate consistency.
For filled mortar joints, the objective is to allow the mortar to firm enough that it can be compressed and shaped while remaining workable. A properly timed finishing process produces cleaner joint profiles and reduces the amount of mortar that ends up on the stone surface.
The important point is that mortar finishing is not simply a matter of waiting a predetermined number of minutes. The installer needs to pay attention to the condition of the mortar.
How to Finish Mortar Joints on Manufactured Stone Veneer
When a manufactured stone veneer installation uses visible mortar joints, the joints should be filled consistently and finished according to the desired appearance.
The mortar should be properly packed into the joints rather than simply spread over the surface. Once the mortar reaches the appropriate consistency, it can be tooled into the desired profile.
The shape of the finished joint can influence both appearance and the way the wall handles water. Concave and V-shaped joints are common choices for installations where visible mortar joints are part of the design.
Consistency is particularly important. Slight variations can occur naturally during masonry work, but large differences in joint depth, width, or profile can make a finished wall appear uneven.
The tooling process should also be controlled carefully around the stone edges. The goal is to shape and compress the mortar rather than aggressively scrape against the manufactured stone.
The final joint profile should complement the stone. A heavily textured stone may benefit visually from a joint that allows the individual pieces to remain dominant, while a more formal stone profile may work well with a cleaner, more defined joint.
For a deeper look at creating consistent and professional-looking joints, see perfect grout lines for your stone veneer.
Does Stone Veneer Need Grout?
One of the most common questions surrounding stone veneer finishing is whether manufactured stone veneer needs grout.
The answer depends on the installation style and the appearance being created. Many manufactured stone veneer installations use mortar joints, while certain profiles and installation designs may use tight-fitted joints with minimal visible mortar.
The terminology can also create confusion. Mortar is used as part of the installation system and may also be used to create filled joints. Grout can be used in specific finishing applications, but the two materials should not automatically be treated as interchangeable.
The appearance of the finished stone also matters. A traditional mortar-joint installation may have clearly defined spaces between the stones, while a dry-stack-style appearance may emphasize the stones themselves with very little visible joint material.
The correct approach is to follow the installation instructions for the specific manufactured stone veneer being installed and the joint appearance specified for the project.
For a more detailed explanation of when grout is used and how it relates to manufactured stone veneer, see does stone veneer need grout?
Over Grouting Stone Veneer
Over grouting is another finishing approach that can dramatically change the appearance of manufactured stone veneer.
Instead of creating sharply defined mortar joints with cleanly separated stone faces, over grouting allows mortar to extend farther onto portions of the stone surface. This can create a more weathered, substantial, or old-world masonry appearance.
The amount of mortar coverage is an important design decision. A small amount of over grouting can soften the transitions between stones, while heavier coverage can substantially change the visual character of the entire wall.
Over grouting should be intentional rather than the result of poor cleanup. There is an important difference between a deliberately over-grouted installation and mortar that has simply been smeared across the stone because it was not cleaned properly.
For a closer look at this particular finishing technique, see over grouting stone veneer.
Perfecting the Appearance of Mortar Joints
The quality of a finished stone veneer wall is often judged by the consistency of its joints.
Perfectly uniform joints are not necessarily the goal with every stone profile. Manufactured stone is designed to replicate the variation and character of natural masonry, and some installations intentionally use irregular stone shapes and varied joint dimensions.
The goal is controlled variation rather than accidental inconsistency.
The mortar color should complement the stone rather than overpower it. The joint depth should be appropriate for the selected profile. The tooling should remain consistent throughout the installation, and excess mortar should not be left across the faces of the stone.
A mock-up can be extremely useful when the joint appearance matters. Creating a small representative section allows the homeowner, designer, contractor, or builder to evaluate the relationship between the stone, mortar color, joint width, and tooling before the entire wall is completed.
This is especially valuable when multiple stone colors or profiles are being combined.
Finishing Manufactured Stone Veneer With Architectural Accessories
Some of the most important finishing work happens around the edges and transitions of a project rather than in the middle of the wall.
Manufactured stone veneer accessories are designed to complete these areas. Depending on the manufacturer and product collection, accessories can include sills, corners, capstones, hearthstones, trim stones, keystones, light-box trim, outlet trim, water-box trim, and other specialty pieces.
These pieces can provide both visual and functional benefits. They can create cleaner transitions, provide a more finished appearance around openings, and help avoid awkward cuts where ordinary veneer pieces would otherwise have to be forced into an architectural detail.
Accessories should be considered part of the overall design rather than an optional afterthought.
For a broader look at the different types of finishing pieces available for manufactured stone veneer, see stone veneer accessories.
Finish Your Project With Stone Veneer Sills
Windows are one of the most noticeable transition points on a stone veneer wall. The stone needs to meet the window opening cleanly, and the lower portion of the opening often requires a dedicated finishing element. Stone veneer sills can provide that transition.
A sill can visually separate the window from the stone wall while adding depth and architectural character. It can also create a more substantial appearance around windows than simply cutting field stone to fit beneath the opening.
Sills can be particularly effective on traditional, craftsman, farmhouse, and rustic architectural styles, but they can also be incorporated into contemporary designs when the proportions and profile are appropriate.
The sill should be considered during the layout of the surrounding stone. The goal is to make the window treatment appear integrated into the wall rather than added after the stone has already been installed.
For more information about using sills to complete a manufactured stone veneer installation, see stone veneer sills.
Stone Veneer Corners
Outside corners are another area where finishing details have an outsized effect on the appearance of a project. If flat veneer pieces are simply cut and butted together at an outside corner, the result can expose an obvious edge and make the veneer look more like a surface treatment than masonry.
Manufactured stone corner pieces are designed to create a more convincing transition around outside corners. The return of the corner piece allows the stone to wrap around the edge of the wall and maintain a more natural masonry appearance.
Corners can be especially important on the front elevations of homes, where they are often visible from multiple angles. They can also be used around columns, fireplaces, outdoor kitchens, entry features, and other architectural elements.
The layout of corner pieces should be planned along with the rest of the wall. Alternating the orientation of corner pieces and maintaining a natural-looking pattern can help prevent obvious vertical seams.
For a dedicated explanation of choosing and installing these pieces, see stone veneer corners.
What is a Capstone?
A capstone is a finishing stone used along the top of a wall, column, pier, seat wall, or similar architectural feature.
Capstones are important because the top of a masonry feature is highly visible and often needs a different treatment from the vertical wall beneath it. Simply ending vertical veneer at the top can leave an exposed edge and create an unfinished appearance.
A properly selected capstone creates a visual termination for the stonework and can add architectural definition to the feature.
On exterior applications, the top of a wall also needs to be considered from a water-management perspective. The finishing detail should not create a condition that allows water to collect behind or within the veneer system.
Capstones can be particularly effective on outdoor living projects, retaining-wall features, columns, porch walls, garden walls, and architectural seat walls.
If you are deciding whether your project needs a capstone or want to understand the different applications, see what is a capstone?.
What is a Hearthstone?
A hearthstone is a horizontal stone element used as part of a fireplace or hearth design.
Hearthstones are different from ordinary wall veneer because they are installed as a horizontal architectural feature and have different application considerations. They can provide a substantial visual base beneath a fireplace and create a finished transition between the vertical stonework and the floor or hearth area.
The size, thickness, installation method, and permitted application of a hearthstone depend on the specific product. A hearthstone should never automatically be treated as flooring simply because it is a horizontal stone product.
This distinction is particularly important because some manufactured stone hearth products are not intended for foot traffic.
The surrounding fireplace assembly must also be designed and installed according to applicable requirements. Manufactured stone veneer may be non-combustible, but the entire assembly and the materials surrounding a heat source need to be appropriate for the application.
For more information about this specialized finishing element, see what is a hearthstone?
Finishing Around Doors, Windows, and Openings
Architectural openings require careful attention because the stone transitions into another material at these locations.
Around windows and doors, manufactured stone veneer may meet wood trim, metal, vinyl, masonry, or another exterior finish. The transition needs to look intentional while allowing the surrounding materials to perform as designed.
Specialty trim pieces can be useful around these openings. Sills can finish the bottom of windows, while trim stones, headers, keystones, or other accessories can create additional definition around openings.
Where the stone meets another material, the transition should not simply be filled indiscriminately with mortar. Movement and water-management considerations may require a properly designed sealant joint or other transition detail.
These areas should therefore be planned before the stone is installed rather than improvised after the wall is complete.
Finishing Around Electrical and Plumbing Features
Exterior walls frequently contain electrical boxes, lights, outlets, hose connections, vents, and other penetrations.
These details can be difficult to finish neatly if the installer simply cuts standard stone pieces around them.
Specialty stone veneer accessories can provide a cleaner solution. Trim pieces designed around light fixtures, electrical outlets, or plumbing penetrations can help integrate these features into the stonework.
Where specialty accessories are not available, the stone needs to be carefully cut and fitted so that the transition remains clean and appropriate for the particular application.
These details may seem small, but they can have a major effect on the finished appearance of a wall. A beautifully installed stone facade can look unfinished if an electrical box or hose connection is surrounded by irregular cuts and excessive mortar.
Cleaning Manufactured Stone Veneer After Installation
Cleaning is one of the final stages of finishing manufactured stone veneer, but it should not be confused with aggressive washing. For a more detailed look at cleaning, curing, finishing mortar joints, and removing excess mortar after installation, see our post on how to clean and finish manufactured stone veneer after installation.
The objective is to remove construction debris and excess mortar without damaging the stone surface or disturbing the mortar joints.
Fresh mortar should be handled carefully. Attempting to wipe wet mortar across the stone can spread cementitious material into the texture of the veneer and create a larger cleaning problem.
A dry, soft brush can be useful for removing loose mortar residue once it has reached an appropriate condition. More extensive cleaning should follow the specific manufacturer's recommendations for the stone.
Harsh acids, abrasive tools, wire brushes, and aggressive pressure washing should not automatically be considered appropriate simply because the stone is a masonry product. Cleaning methods that are too aggressive can affect the appearance of manufactured stone and damage mortar joints.
The safest approach is to begin with the least aggressive cleaning method and only increase the cleaning intensity when necessary and appropriate for the specific product.
Why Cleaning Too Early Can Cause Problems
The timing of cleanup matters almost as much as the method.
When mortar is still soft, excessive wiping can spread it across the stone. Instead of removing the material, the installer may create a thin film of mortar that settles into the texture of the stone.
Once that material cures, removing it can be considerably more difficult.
This is why good installation practices emphasize maintaining a clean work area throughout the project rather than waiting until the end and attempting to clean the entire wall at once.
The installer should also avoid allowing large amounts of mortar to accumulate on the face of the stone. Prevention is almost always easier than restoration.
Curing Manufactured Stone Veneer
Curing is another essential part of the finishing process.
Mortar and other cementitious materials need appropriate conditions to develop their intended properties. Temperature, moisture, wind, and other environmental factors can affect curing.
Exterior installations can be particularly sensitive to weather. Hot, dry, windy conditions can cause materials to lose moisture rapidly, while cold weather can slow curing and create additional concerns.
The installation should be protected and handled according to the manufacturer's requirements for the specific product and conditions.
Curing also affects when additional treatments should be applied. A wall should not automatically be sealed, limewashed, or otherwise treated immediately after installation simply because the stone has been placed.
Allowing the installation to reach the appropriate stage of cure helps ensure that subsequent finishing treatments do not interfere with the underlying materials.
Should Manufactured Stone Veneer Be Sealed?
Whether manufactured stone veneer should be sealed depends on the specific product, application, and manufacturer's recommendations.
Interior and exterior installations can have different sealing considerations. For more information about sealing indoor applications, see does interior stone veneer need to be sealed?. For outdoor applications, see does exterior stone veneer need to be sealed?
A compatible breathable masonry sealer may be appropriate for some installations and can provide additional protection against moisture absorption and staining. However, sealing is not automatically required for every manufactured stone veneer installation.
The type of sealer matters. A product that creates a heavy surface film can change the appearance and moisture behavior of the stone. A breathable penetrating treatment may be more appropriate where a protective treatment is permitted.
Sealers can also alter the color or sheen of manufactured stone. Some products can deepen the appearance of the colors or make the surface appear darker.
For that reason, any proposed sealer should be tested on an inconspicuous area before the entire installation is treated.
Most importantly, a sealer should never be used to hide an unresolved moisture problem. If a wall is experiencing excessive water exposure, drainage problems, or persistent efflorescence, the underlying issue should be addressed first.
Decorative Finishes for Manufactured Stone Veneer
Not every project is intended to retain the original appearance of the manufactured stone.
Decorative finishing techniques can be used to create a different visual effect, particularly when homeowners want a more weathered, European, rustic, aged, or monochromatic appearance.
Two techniques that are frequently associated with masonry finishes are German smear and limewashing.
These treatments are not the same thing as ordinary mortar-joint finishing. They are intentional decorative treatments that change the appearance of the finished stone.
Because they alter the appearance of the manufactured stone veneer, they should only be considered after confirming that the specific product can be treated in this manner and understanding how the treatment may affect applicable manufacturer warranties.
Applying a German Smear Finish to Stone Veneer
German smear, sometimes called German schmear, is a decorative masonry treatment that uses mortar to create a weathered, old-world appearance.
Rather than keeping every stone face completely exposed and every joint sharply defined, mortar is intentionally worked across portions of the stone surface. Some areas may remain relatively clean while others receive more mortar coverage.
The resulting appearance can range from subtle to heavily textured.
The technique works particularly well when the desired aesthetic is rustic, aged, European, farmhouse, or historic. It can soften strong color contrasts and make an installation appear as though it has developed character over time.
However, German smear is not simply a method of correcting uneven mortar. It is a deliberate design treatment.
The amount of mortar applied, the pressure used during application, and the amount removed afterward all influence the final appearance.
For a dedicated post to this technique, see applying a German smear finish to stone veneer.
Limewashing Manufactured Stone Veneer
Limewashing is another decorative treatment that can significantly change the appearance of manufactured stone veneer.
A limewash can create a lighter, softer, more weathered appearance while allowing portions of the underlying stone color and texture to remain visible.
This can be particularly attractive when the goal is to create a whitewashed, aged, European, farmhouse, or coastal appearance without completely covering the character of the stone.
However, limewashing should be approached differently from ordinary cleaning or sealing. It changes the surface appearance and may have implications for the manufacturer's warranty.
Before applying limewash to manufactured stone veneer, verify the manufacturer's current recommendations and warranty requirements for the specific product. A decorative treatment that looks attractive may not be appropriate for every manufactured stone system.
For more information about the technique and considerations involved, see limewashing manufactured stone veneer.
Finishing Tight-Fitted and Dry-Stack-Style Stone Veneer
Not every stone veneer installation has prominent mortar joints.
Some manufactured stone profiles are designed to be installed with tight-fitted joints that minimize the amount of visible mortar. This creates a more contemporary or dry-stack-style appearance and places greater visual emphasis on the individual stone pieces.
For a deeper look at planning, installing, and achieving this type of appearance, see our complete guide the art of dry stacking.
The finishing process for these installations focuses heavily on controlling mortar squeeze-out and keeping the stone faces clean.
Because there is less visible mortar to hide irregularities, the placement of individual stones becomes especially important. Gaps that are too large or inconsistent can become immediately noticeable.
The installer should maintain the intended joint appearance throughout the installation rather than allowing the spacing to become progressively wider or narrower.
The final cleaning process is also important because mortar residue can be more obvious against the broad, exposed faces of a tight-fitted stone installation.
Finishing the Top of a Stone Veneer Wall
The top edge of a wall is one of the most important finishing details in an exterior stone veneer project. Vertical veneer should not simply terminate at an exposed horizontal edge without considering how the top of the wall will be finished.
Capstones, wall caps, or other approved finishing systems can provide a more complete appearance while helping direct water away from the wall assembly. The cap should be selected based on the wall's dimensions, architectural style, and the manufacturer's available accessories.
The overhang and slope of the cap can also influence the appearance and water-shedding characteristics of the finished wall.
This is particularly important on freestanding walls, columns, garden walls, seat walls, and other features where the top surface is exposed to weather.
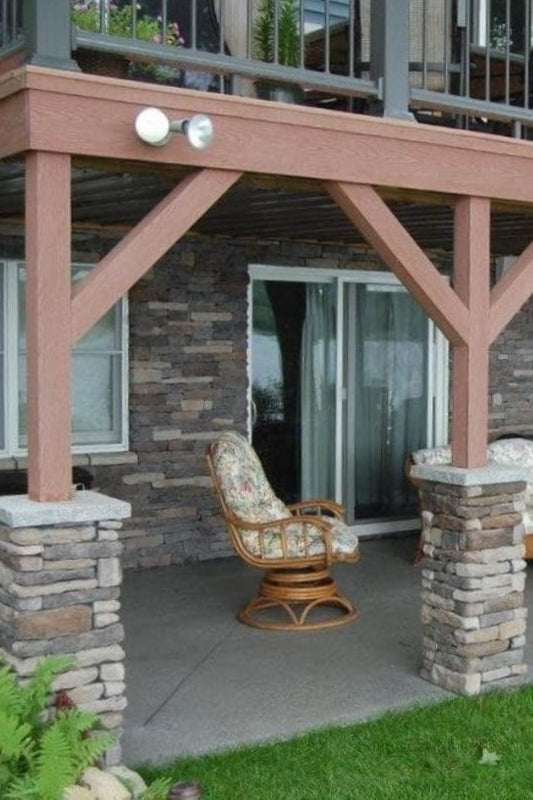
Finishing Columns With Manufactured Stone Veneer
Columns are another application where finishing accessories can make a major difference. A column may require corner pieces to wrap the vertical edges and a cap or other architectural element at the top.
The layout needs to be balanced on all visible sides. Because columns are often viewed from multiple directions, an installation that looks good from one angle can reveal awkward joints or cuts from another.
The transition between the stone veneer and the top architectural element should also appear deliberate.
Using matching or complementary accessories can create a more finished appearance and help the column look like a masonry architectural feature rather than a post that has simply been covered with stone.
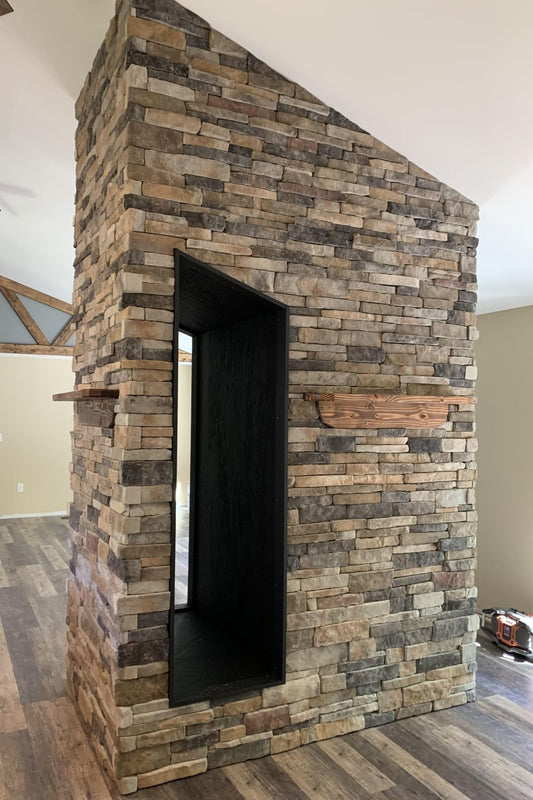
Finishing Fireplace Stone Veneer
Fireplace installations require particular attention because they combine decorative stone veneer with a heat-producing feature.
The manufactured stone veneer should be installed according to the manufacturer's requirements and applicable building and fire-safety requirements for the specific fireplace.
The finishing details can include corners around the firebox, trim pieces, a mantel transition, and a hearthstone or other hearth material.
A hearthstone can create a strong visual base for the fireplace and provide a transition between the vertical veneer and the surrounding floor or hearth area.
The fireplace should never be treated as an ordinary wall simply because manufactured stone veneer is being used. The substrate, clearances, mortar, surrounding materials, and fireplace assembly all need to be appropriate for the application.
Mantels and other structural or architectural elements should also be independently supported as required rather than relying on the veneer itself to carry structural loads.
Finishing Manufactured Stone Veneer Around Mantels
A mantel can become one of the most prominent architectural elements on a stone fireplace. When using a wood mantel, the relationship between the wood and stone should be considered carefully during the design and installation process. For more information, see stone veneer and wood mantels.
The stone veneer needs to transition around the mantel cleanly, while the mantel itself must be properly supported by the underlying structure.
Manufactured stone veneer is a veneer material and should not be treated as structural support for a mantel.
The relationship between the mantel and stone should be considered during installation. The goal is to avoid awkward cuts or inconsistent mortar joints where the two materials meet.
A properly planned transition can make the mantel look integrated into the fireplace rather than simply mounted on top of the finished stone.
Common Manufactured Stone Veneer Finishing Mistakes
Many finishing problems occur because the installer tries to correct an issue after the mortar has already hardened.
Working too aggressively with wet mortar can smear it across the stone. Waiting too long can make joint tooling difficult. Using excessive water during cleanup can spread mortar residue instead of removing it.
Another common mistake is overlooking architectural accessories until after the stone has been installed. This can leave difficult transitions around windows, corners, wall tops, and fireplaces.
Improper cleaning is another concern. Abrasive tools and harsh chemicals can create more damage than the original mortar residue.
Applying an incompatible sealer or decorative finish can also create problems, particularly if the treatment changes the appearance of the stone or conflicts with the manufacturer's care and warranty requirements.
The best finishing results come from planning these details before installation begins.
A Professional Finish Starts With Proper Installation
Finishing cannot compensate for an improperly prepared substrate or poorly installed veneer.
The underlying wall assembly, water-management details, substrate preparation, lath and scratch coat where required, mortar application, and stone placement all contribute to the final result.
Exterior installations require particular attention to water management. The veneer is part of a larger wall assembly, and proper detailing around windows, doors, penetrations, transitions, and the base of the wall is essential.
The stone should also be installed according to the manufacturer's instructions. If a piece has been disturbed after the mortar has begun setting, it may need to be removed and reinstalled rather than simply pushed back into position.
The finishing stage works best when the preceding installation stages have been done correctly.
How to Plan Your Finishing Details Before Installation
The best time to think about finishing is before ordering the stone.
Start by identifying every location where the veneer will transition to another material or architectural feature. Consider windows, doors, outside corners, wall tops, columns, fireplaces, electrical fixtures, plumbing penetrations, and other openings. Then determine which areas require accessory pieces.
This planning stage can also help establish the stone quantity. Ordering only stone without accounting for corners, sills, capstones, hearthstones, or other required pieces can create delays later in the project.
The layout should also be considered. Architectural accessories can affect where the surrounding stone begins and ends, so they should be incorporated into the pattern rather than treated as separate elements.
A well-planned installation tends to require less correction during the finishing stage.
The Final Inspection
Before considering a manufactured stone veneer project complete, inspect the entire installation from both close range and normal viewing distance.
The stone should be checked for mortar smears, construction residue, chipped areas, unusual gaps, and inconsistent placement.
Mortar joints should be evaluated for consistency with the intended design. Corners should wrap naturally. Sills should sit correctly beneath windows. Capstones should create a finished top edge. Hearthstones should be installed appropriately for their intended application.
The transitions around doors, windows, electrical fixtures, plumbing penetrations, and other features should also be inspected.
Finally, look at the installation as a whole.
A wall can be technically complete while still appearing visually unfinished. The final inspection should therefore consider not only whether the stone is installed but whether all of the architectural details work together.
Maintaining the Finished Appearance
Manufactured stone veneer generally requires relatively little maintenance once it has been properly installed and finished.
Routine maintenance may involve removing dirt, dust, cobwebs, and other surface debris. Exterior stone can become dirty from weather exposure, landscaping, irrigation, and airborne contaminants.
Gentle cleaning methods are preferable. Avoid treating manufactured stone as a surface that can automatically withstand aggressive pressure washing, abrasive scrubbing, or harsh chemicals.
The wall should also be monitored for recurring moisture exposure. Sprinklers should not continually saturate the stone, and roof drainage should be directed appropriately.
If a stain, efflorescence, or other discoloration develops, determine the cause before attempting aggressive cleaning.
A properly finished stone veneer installation should remain relatively easy to maintain when the wall is kept clean and protected from avoidable sources of moisture and staining.
Finishing Manufactured Stone Veneer
Finishing manufactured stone veneer is about much more than cleaning mortar from the wall.
It is the process of completing all the details that make the installation look intentional and professionally designed. Mortar joints need to be properly finished. Tight-fitted installations need careful attention to squeeze-out and surface cleanliness. Corners need to transition naturally. Windows can benefit from finished stone veneer sills. Wall tops can be completed with capstones. Fireplaces can incorporate hearthstones and other architectural details.
Stone veneer accessories provide another important part of the finishing process. They help solve transitions around architectural features while adding depth and character to the finished design.
Decorative treatments can take the appearance in another direction. German smear can create an old-world, heavily textured appearance, while limewashing can produce a lighter, weathered look. These techniques should be considered intentional design treatments and evaluated against the specific manufacturer's care and warranty requirements.
The most important principle is to plan the finish before the installation begins. Knowing which accessories will be required, what type of mortar joint you want, how the stone will transition around openings, and whether any decorative treatment is planned will help prevent problems later.
When the stone, mortar, accessories, architectural transitions, and finishing treatments all work together, manufactured stone veneer can create a convincing masonry appearance that feels complete from every angle.
The installation may begin with the stone, but it is the finishing details that bring the entire project together.
From Mountain View Stone: What You Should Know
At Mountain View Stone, we believe the finishing details are just as important as the stone itself. Properly finishing manufactured stone veneer helps bring the entire installation together, from clean mortar joints and carefully finished corners to sills, capstones, hearthstones, and other architectural accessories. Whether you are completing an interior accent wall, exterior facade, fireplace, or outdoor living project, taking the time to plan and finish each detail properly can make a significant difference in the final appearance. Always follow the installation and care instructions for your specific stone veneer product, and when in doubt, consult a qualified professional to ensure your project is completed correctly.
Frequently Asked Questions About Finishing Manufactured Stone Veneer
How do you finish manufactured stone veneer?
Finishing manufactured stone veneer involves completing mortar joints where required, tooling the joints to the desired profile, removing excess mortar, cleaning the stone surface, completing architectural transitions with accessories such as sills, corners, capstones, and hearthstones, and allowing the installation to cure properly. Some projects may also use decorative finishes such as German smear or limewash when permitted for the specific product.
When should you tool mortar joints on manufactured stone veneer?
Mortar joints should be tooled when the mortar has firmed enough to hold its shape while remaining workable. The exact timing varies with weather, temperature, humidity, substrate conditions, and the materials being used. Tooling mortar while it is too wet can cause smearing, while waiting until it is too hard can make it difficult to create a consistent joint.
Does manufactured stone veneer need grout?
Manufactured stone veneer does not necessarily require visible grout joints. The appropriate joint treatment depends on the stone profile, installation method, and desired appearance. Some installations use visible mortar joints, while others are designed for tight-fitted or dry-stack-style joints.
How do you clean mortar off manufactured stone veneer?
Mortar residue should be handled carefully so it is not smeared across the stone surface. Loose residue can generally be removed using an appropriate soft brush once the mortar has reached the proper condition. More extensive cleaning should follow the manufacturer's instructions for the specific manufactured stone veneer. Avoid aggressive cleaning methods unless they are specifically approved.
Can manufactured stone veneer be limewashed?
Limewashing can change the appearance of manufactured stone veneer, but it should only be considered after confirming that the specific product permits the treatment. Limewash is a decorative finish rather than a standard cleaning or sealing method, and homeowners should review the manufacturer's current warranty and care requirements before applying it.
What accessories are used to finish manufactured stone veneer?
Manufactured stone veneer accessories can include sills, corner pieces, capstones, hearthstones, trim stones, keystones, light-box trim, outlet trim, water-box trim, and other specialty pieces. The exact accessories available depend on the manufacturer and stone collection. These pieces can help create finished transitions around windows, corners, wall tops, fireplaces, columns, and architectural or utility features.
What's Next?
Looking for the perfect finishing touches for your manufactured stone veneer project? Explore our selection of stone veneer styles and accessories to complete your design. Shop now to find your perfect stone or order a sample to see the quality and texture firsthand!
Have a Question?
Please see our full terms of service or check out our frequently asked questions.
For general information and questions please call: (864) 882-8960 Mon. - Fri. 8am - 5pm (EST) or email: info@mountainviewstone.net we are more than happy to help you.
Or you can submit your questions via our contact us page.
We look forward to working with you on your upcoming project.
The Mountain View Stone Team
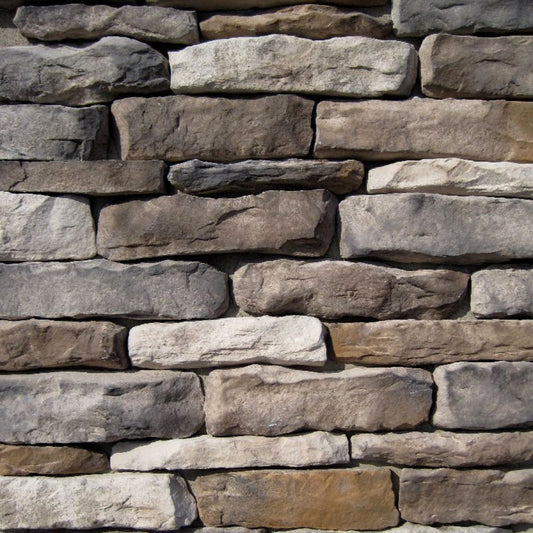
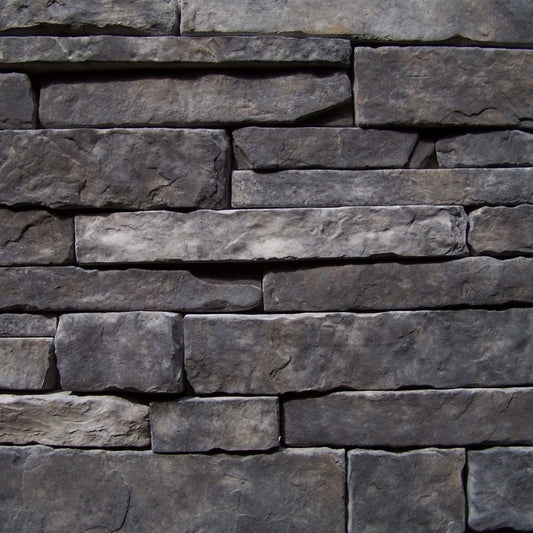
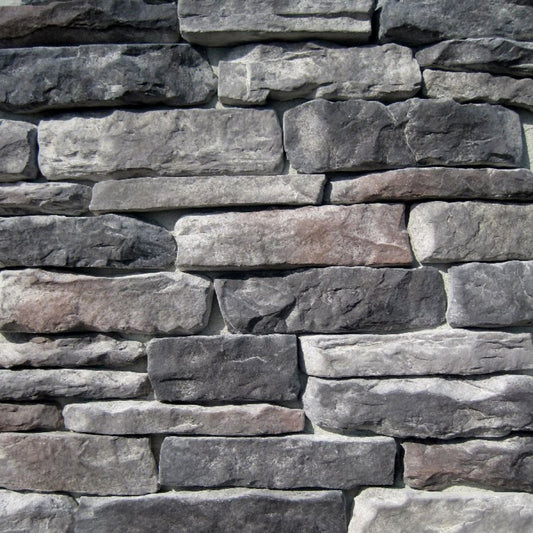
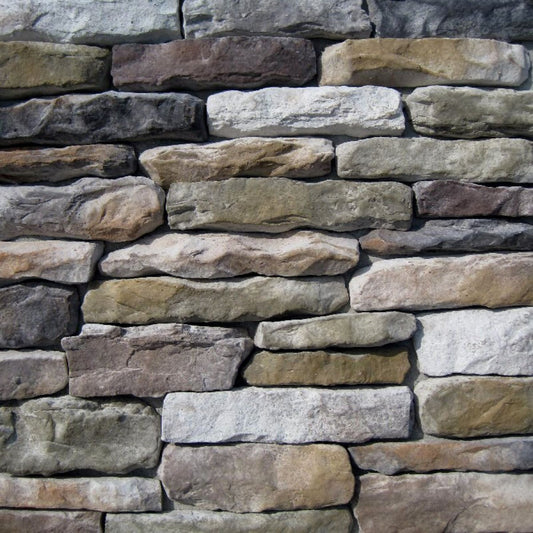
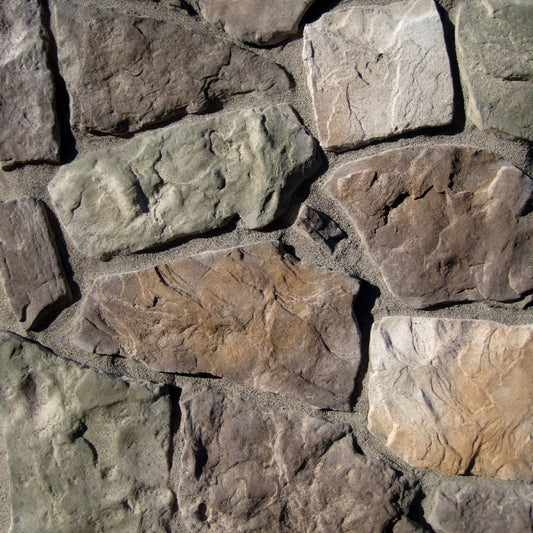
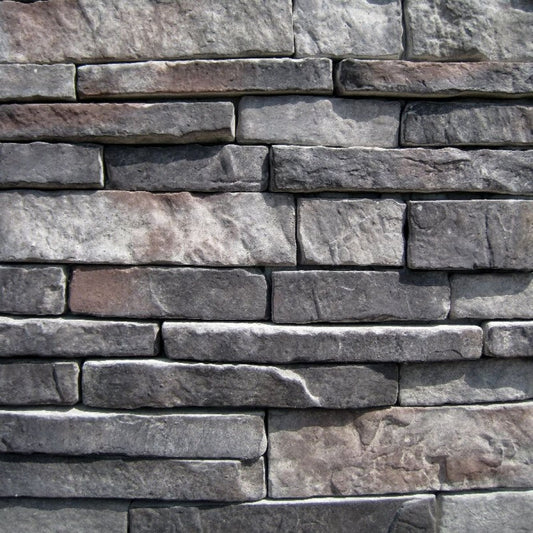
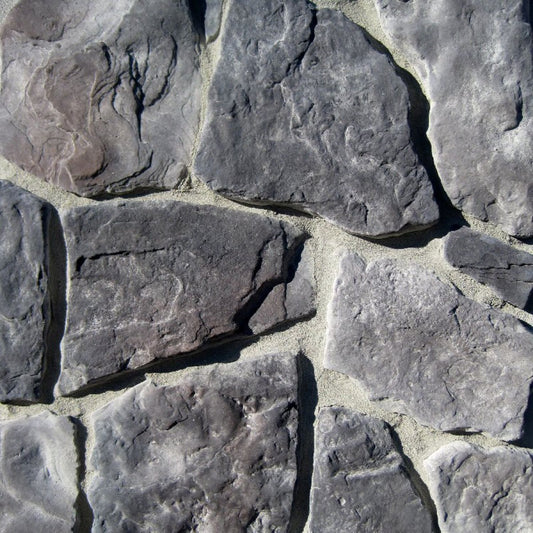
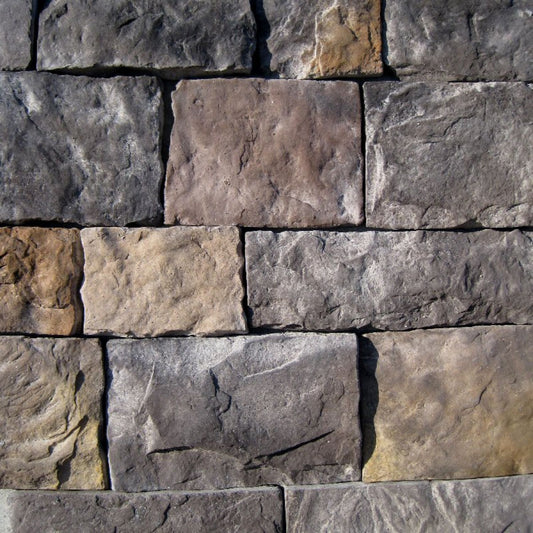
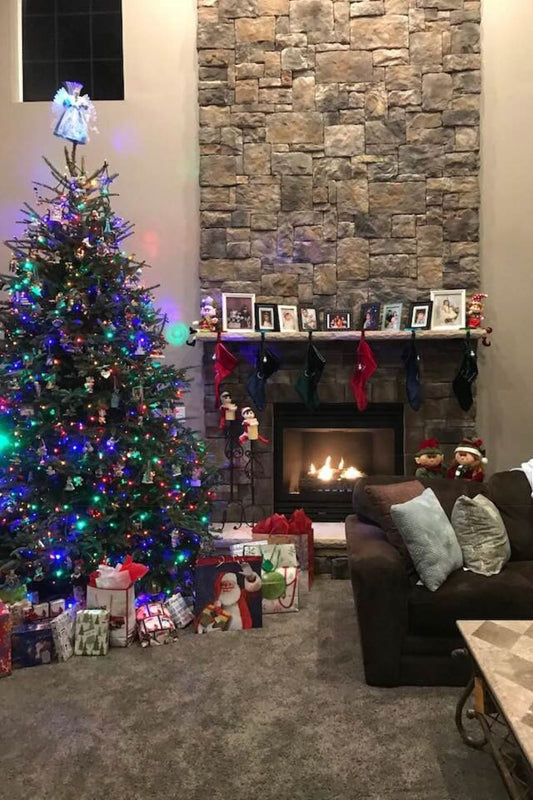
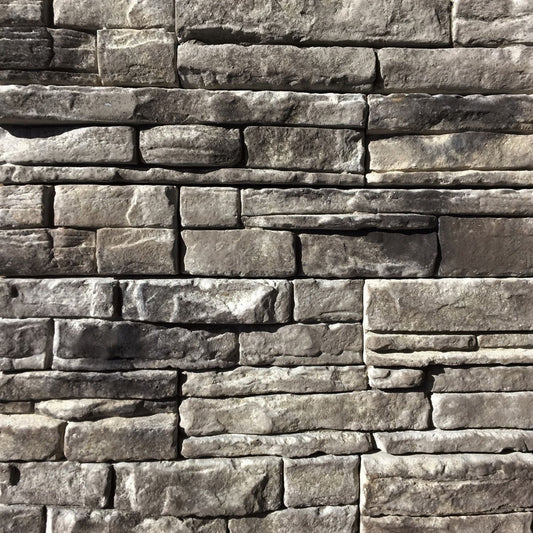
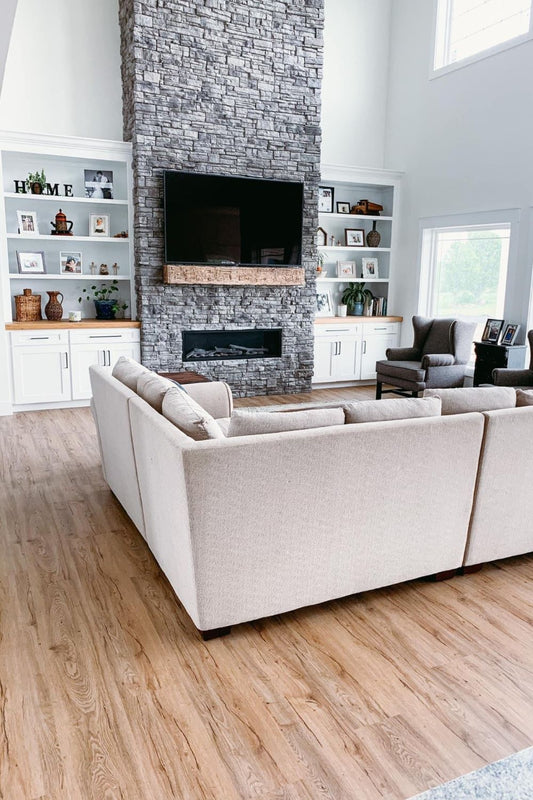
Pictured is hackett stone midnight.